Pheasant Chilaquiles
Go back to all recipes
I decided to do this meal because I needed to find something quick to do with some leftover pheasant meat that I had laid out. I didn't want it to go to waste and I didn't want to re-freeze it. Originally the kids had planned to come over to eat one evening, so I had laid out a bunch of extra meat. I wanted to make sure I had plenty to go around, but the kids ended up canceling at the last minute because they wanted to go out to eat with some friends. I didn't have a lot of time to prepare a meal but needed to use this meat, these Chilaquiles were perfect because they are quick and easy to prepare. I already had a bag of Corn Tostadas that needed to be used, some of dad's fresh farm eggs and a garden full of Jalapeno peppers that needed to be harvested.
If you're not familiar with Chilaquiles, it's like a Mexican breakfast meal, it's quick and easy to make, but packed with flavor. Start to finish, this meal took less than 20 minutes. I made this one evening, after work, when it was just supposed to be Tami and I eating. I had enough stuff to make four plates, so we would have had two extras... and wouldn't you know it, the kids show up, with their girlfriends, wanting to eat. There's a ton of different ways to make these Chilaquiles, what's great about them, is how easy they are to customize for each person with different topping, like Jalapeno's, Green Onions, Red Onion, Cilantro, Lime Zest, Lime Juice, your favorite Hot Sauce and different cheeses.
If you already have the Salsa and Pickled Jalapenos, this meal shouldn't take more 15 to 20 minutes to make. I'm including directions on how to make this Salsa, Sliced Jalapenos, and seasoning blend, but you can save the preparation time by using store bought items.
My garden didn't seem to do that good this year, my Tomato plants struggled, my Brussel sprouts aren't producing anything, and my pumpkins died, but the 4 or 5 Peppers plants I put out just keep producing Peppers. I didn't want them to go to waste, so I just started pickling them. It doesn't take long to pickle these Jalapenos, maybe 15 minutes, now I have jars and jars of them in the refrigerator. I've been putting them on pretty much everything!
Ingredients
Mexican Seasoning Blend
Roasted Tomato Salsa
Pickled Jalapenos
Chilaquiles
Instructions
Mexican Seasoning Blend
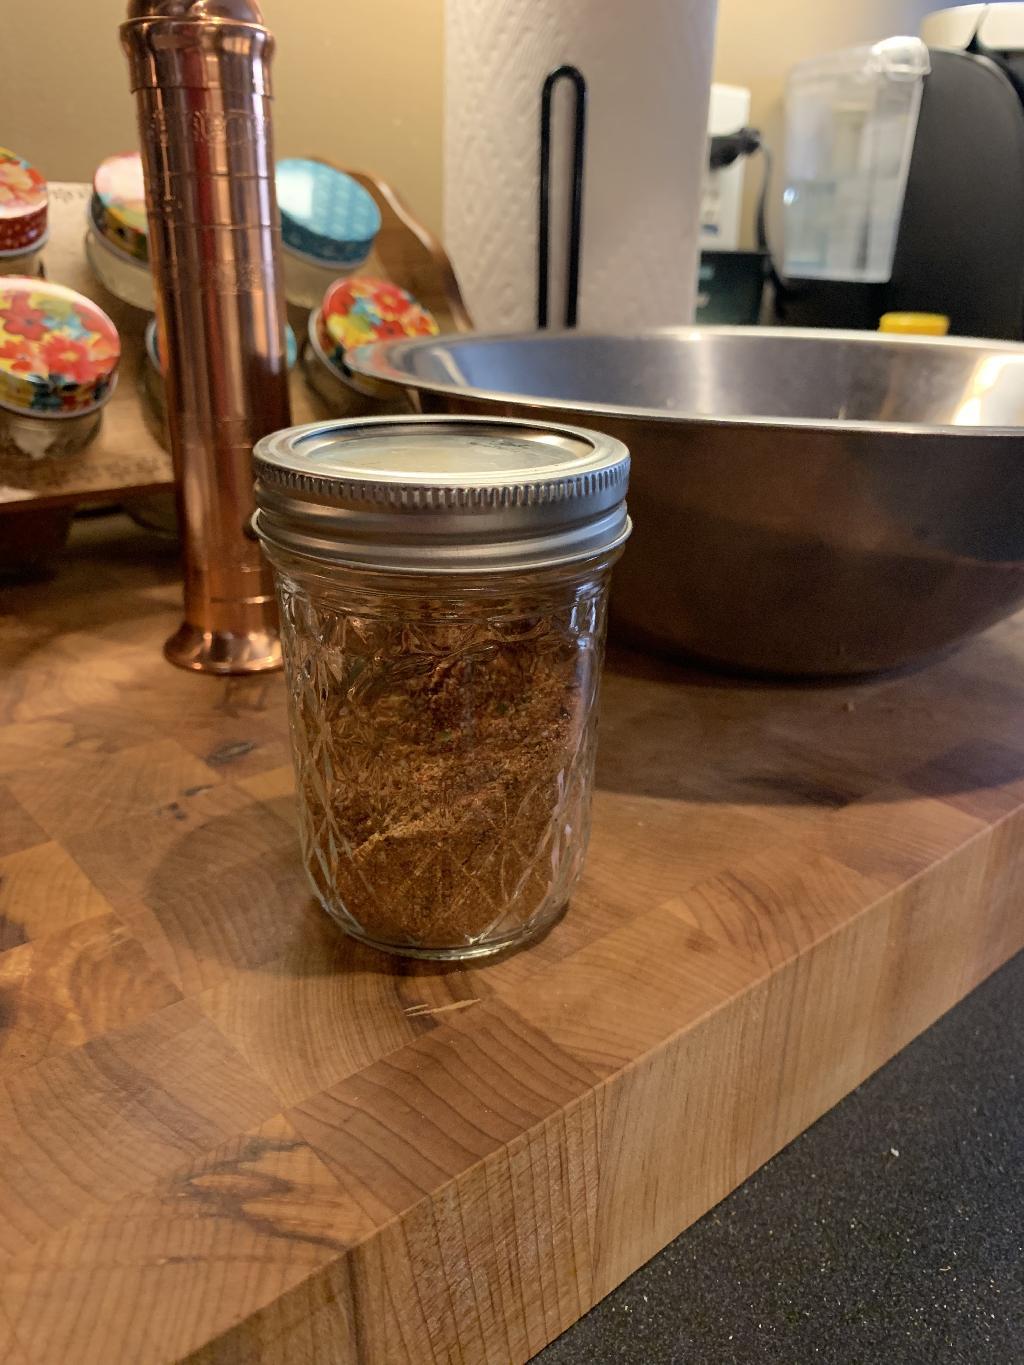
Step #1 To make Mexican Seasoning blend, combine all the ingredient in a small bowl or jar. Cover and give a good shake or use a small whisk to combine.
Roasted Tomato Salsa
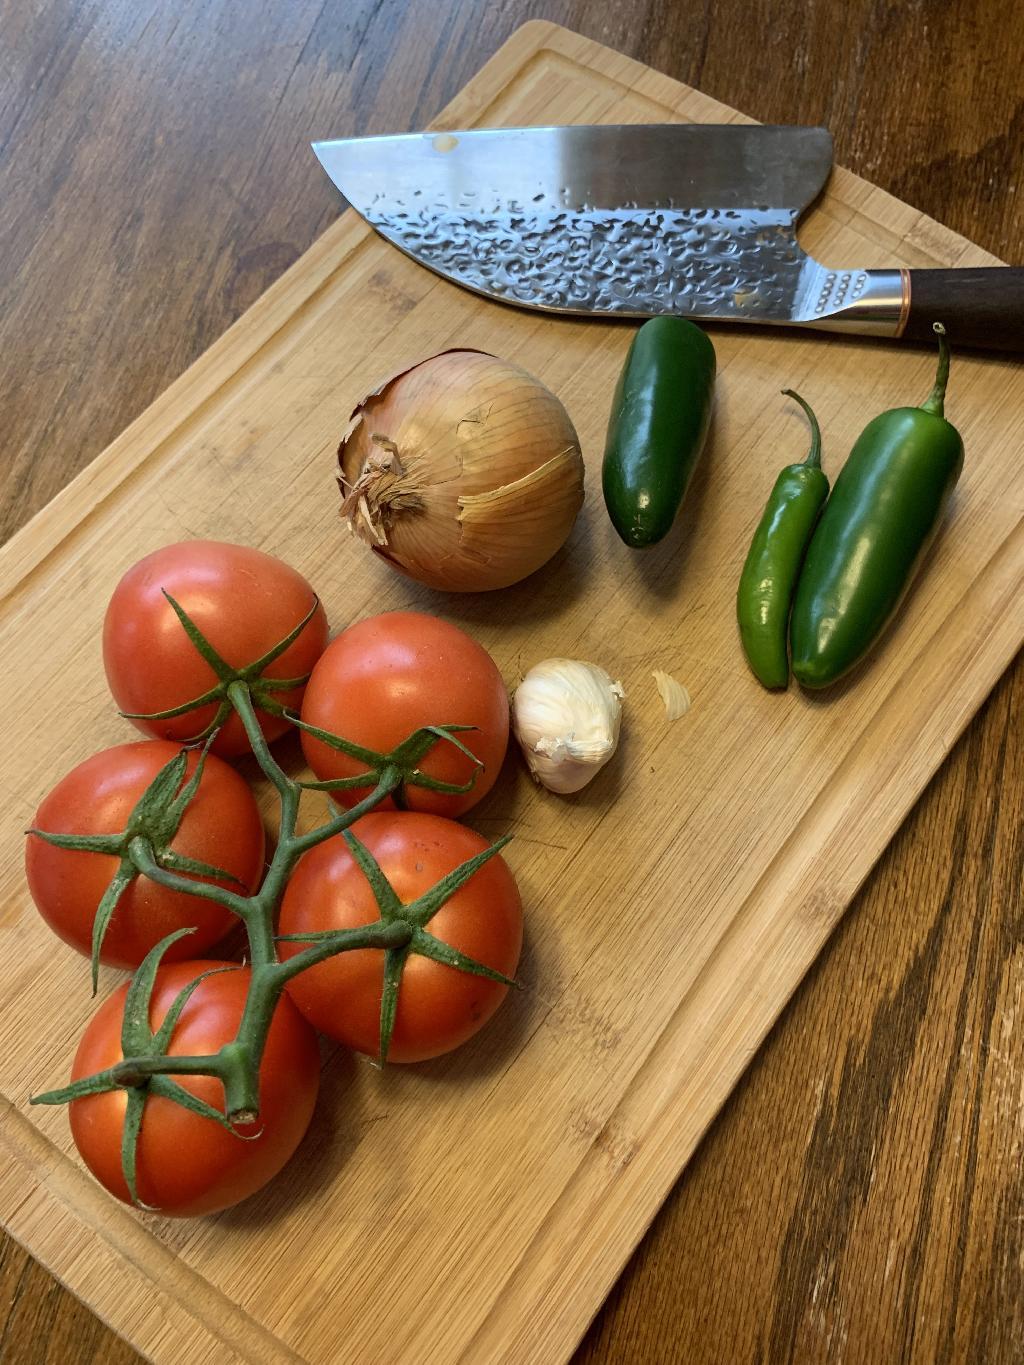
Step #1 Wash and rinse the peppers and tomatoes.
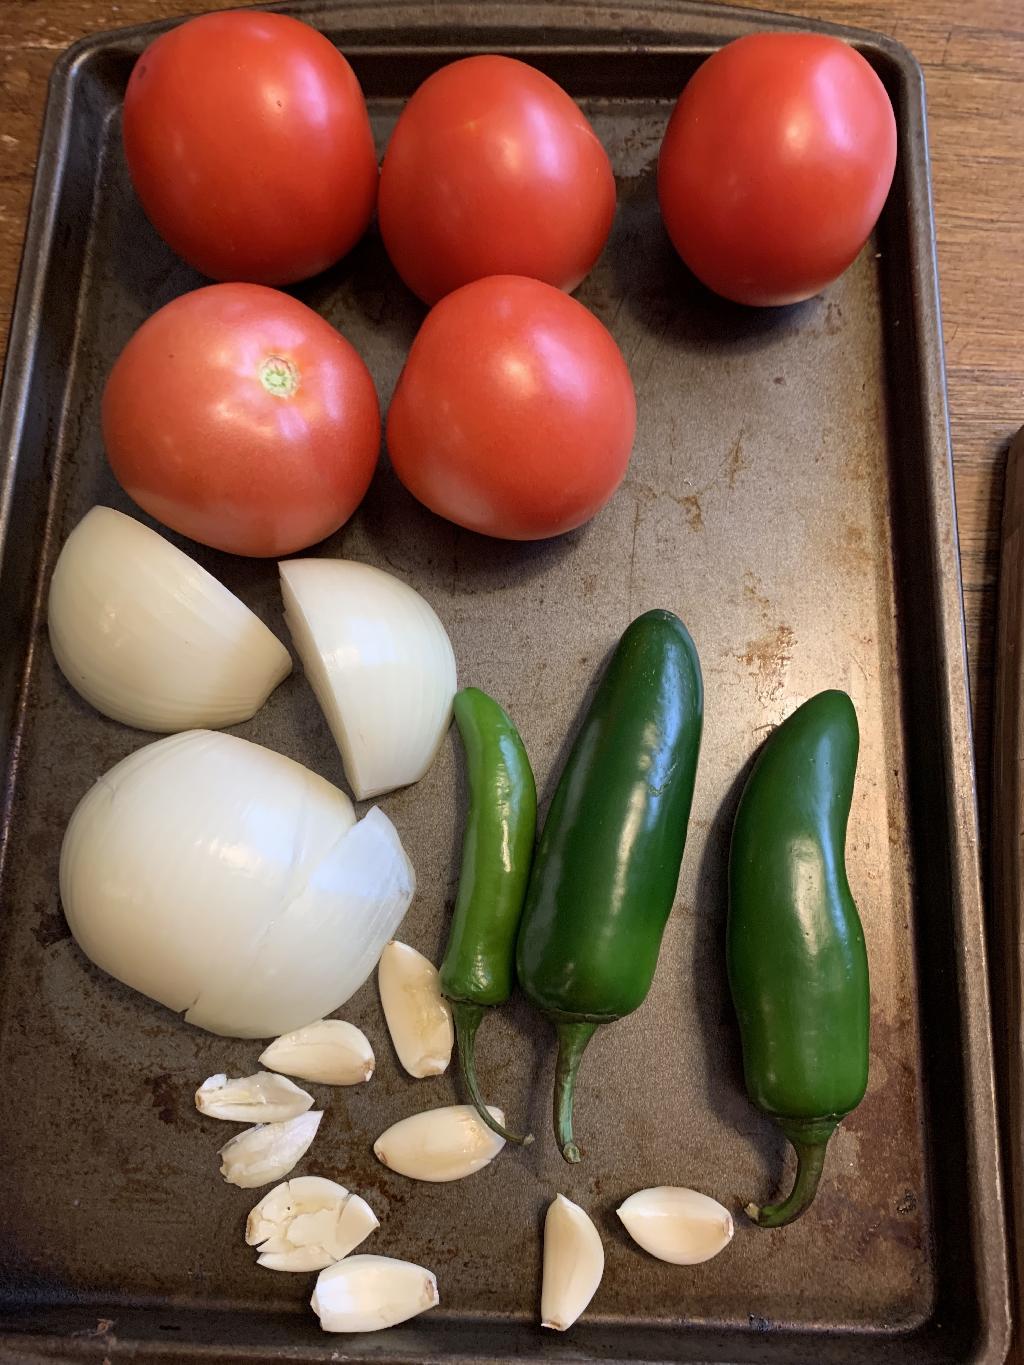
Step #2 Set oven broiler to high. Peel and quarter the onion. Add Whole Tomatoes, Jalapenos, Serrano, Garlic and quartered up Onion to cooking sheet.
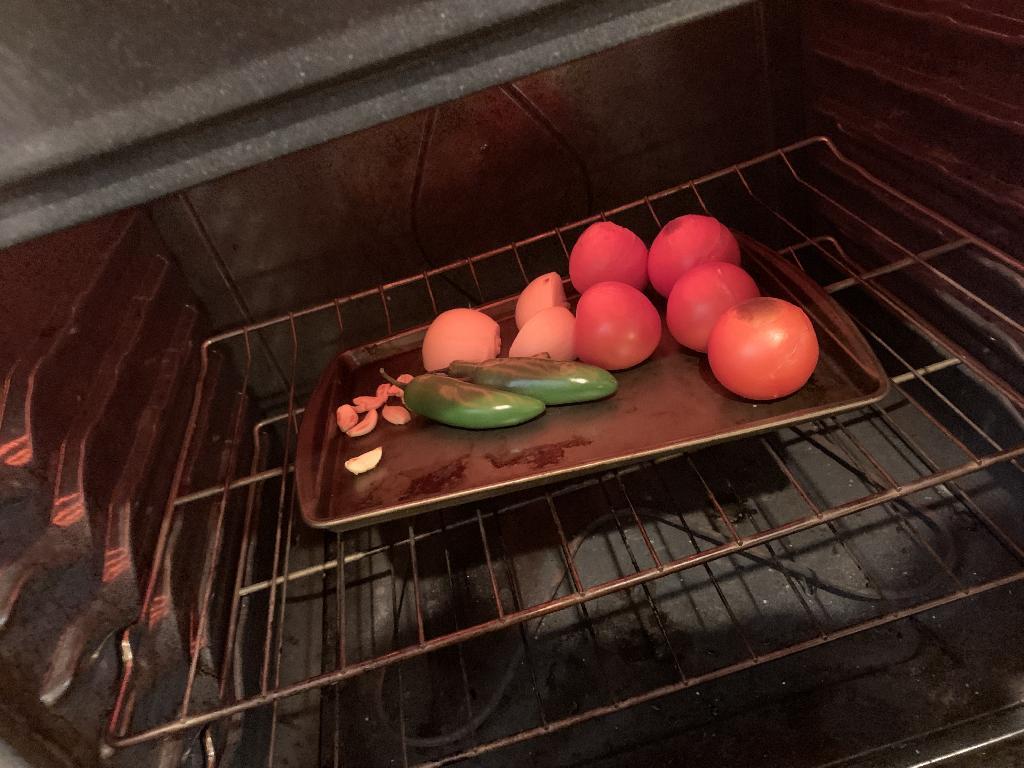
Step #3 Stick in the oven and allow to char. Be sure to turn vegetables over halfway through cooking. Could take 10-15 minutes.
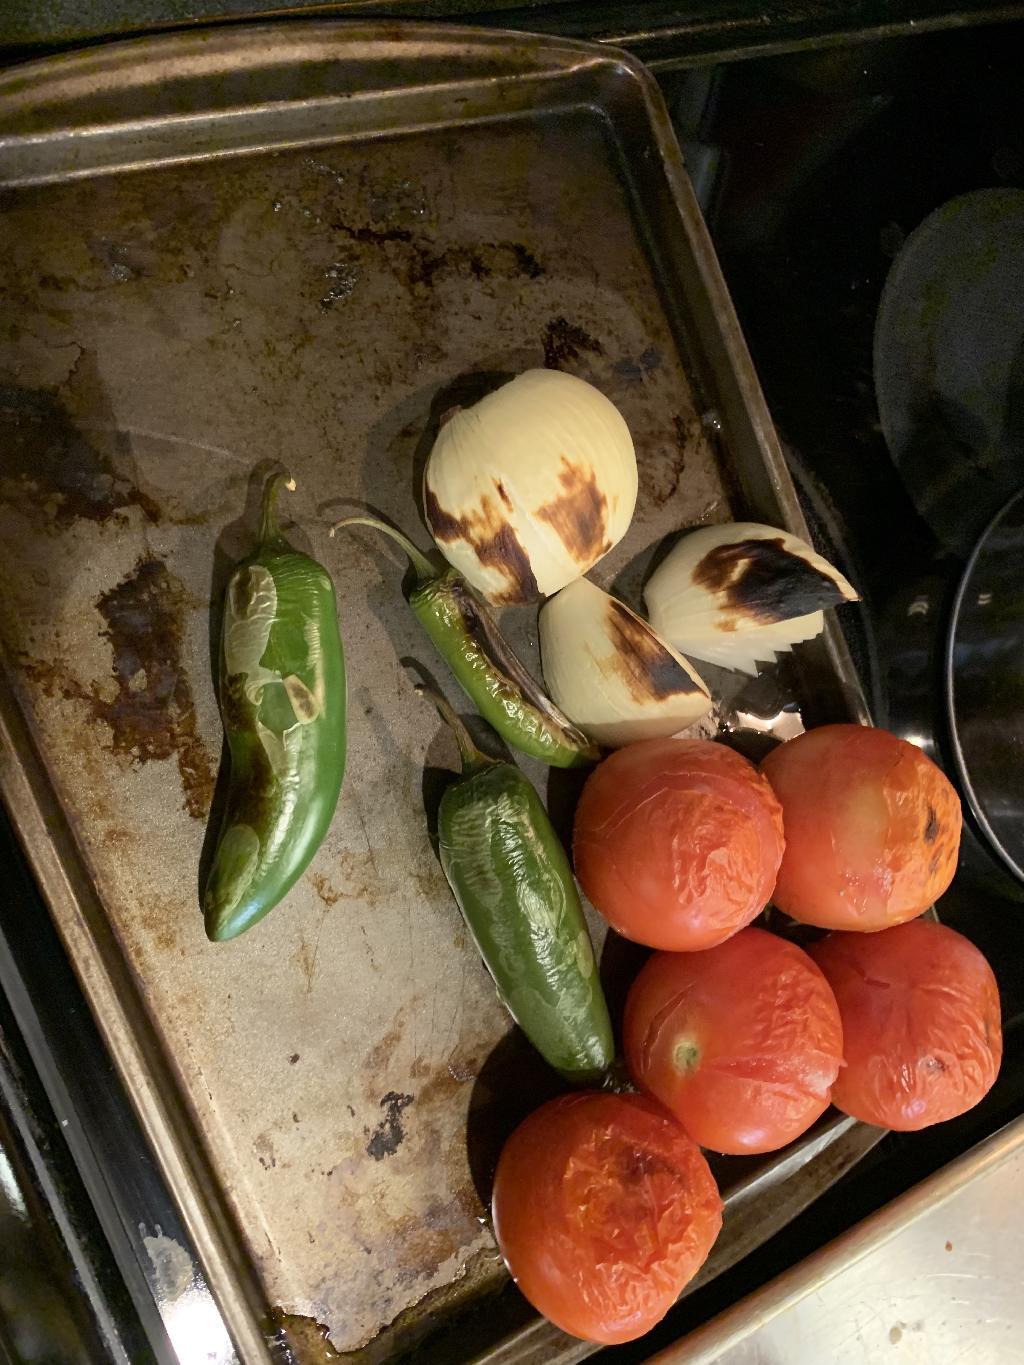
Step #4 Allow the peppers to cool, then remove the seeds. I removed the Jalapeno seeds but left the seeds from the Serranos.
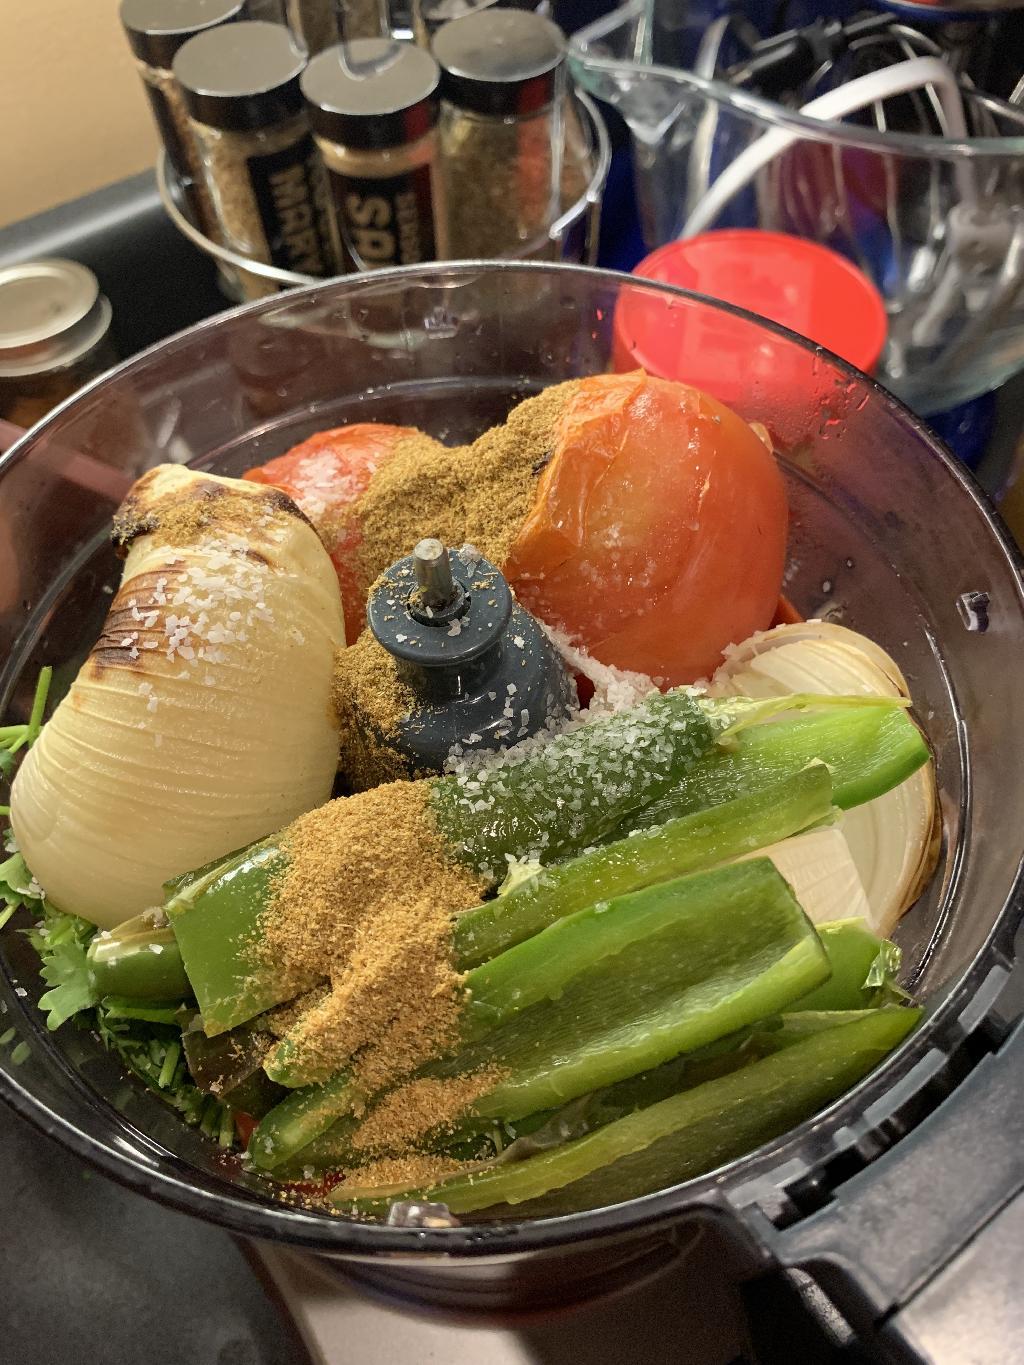
Step #5 Add roasted vegetables, Cilantro, Lime Juice, seasoning and salt to food processor and pulse until you get the consistence you want.
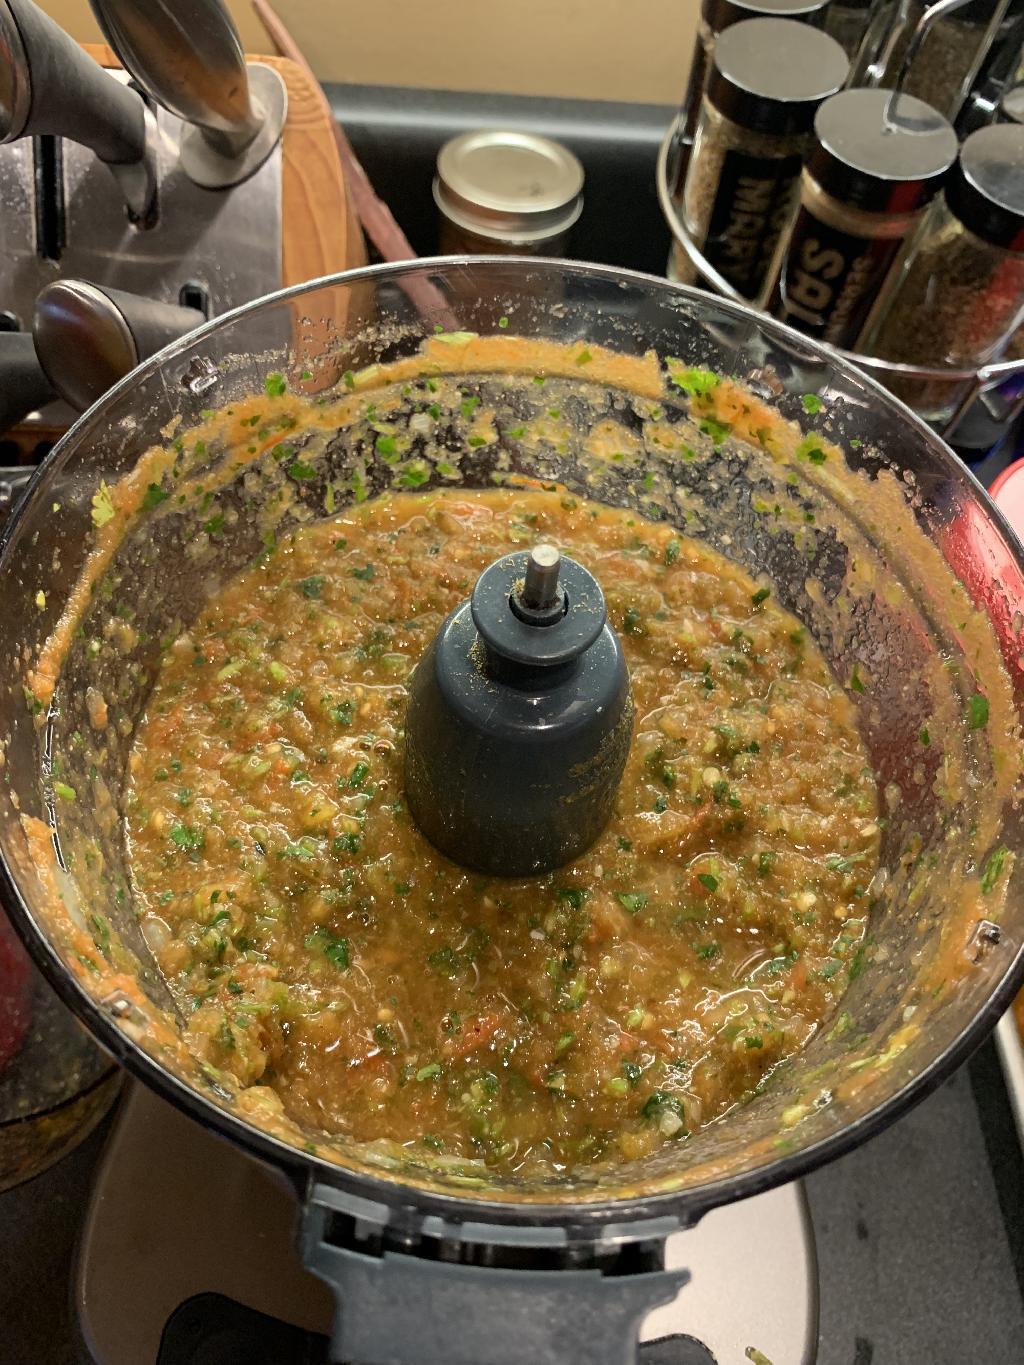
Step #6 Taste and add more salt and / or seasoning if need. Place in the refrigerator and allow to cool. This really needs to be made a day ahead of time to allow the flavors to develop.
Pickled Jalapenos
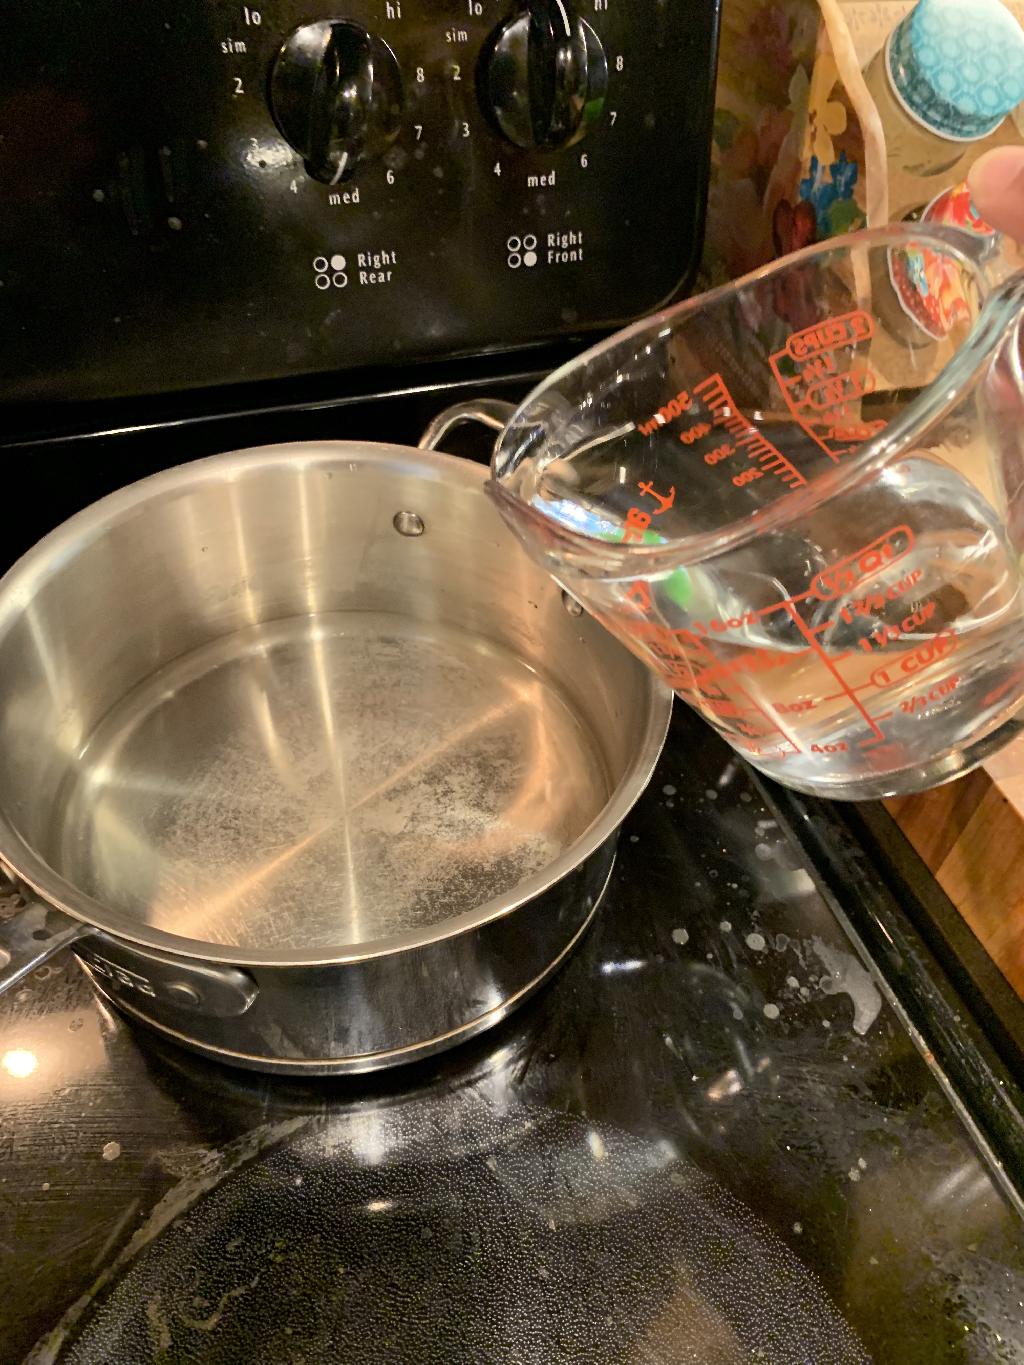
Step #1 Place saucepan on burner then set heat to high. Add Water and Vinegar.
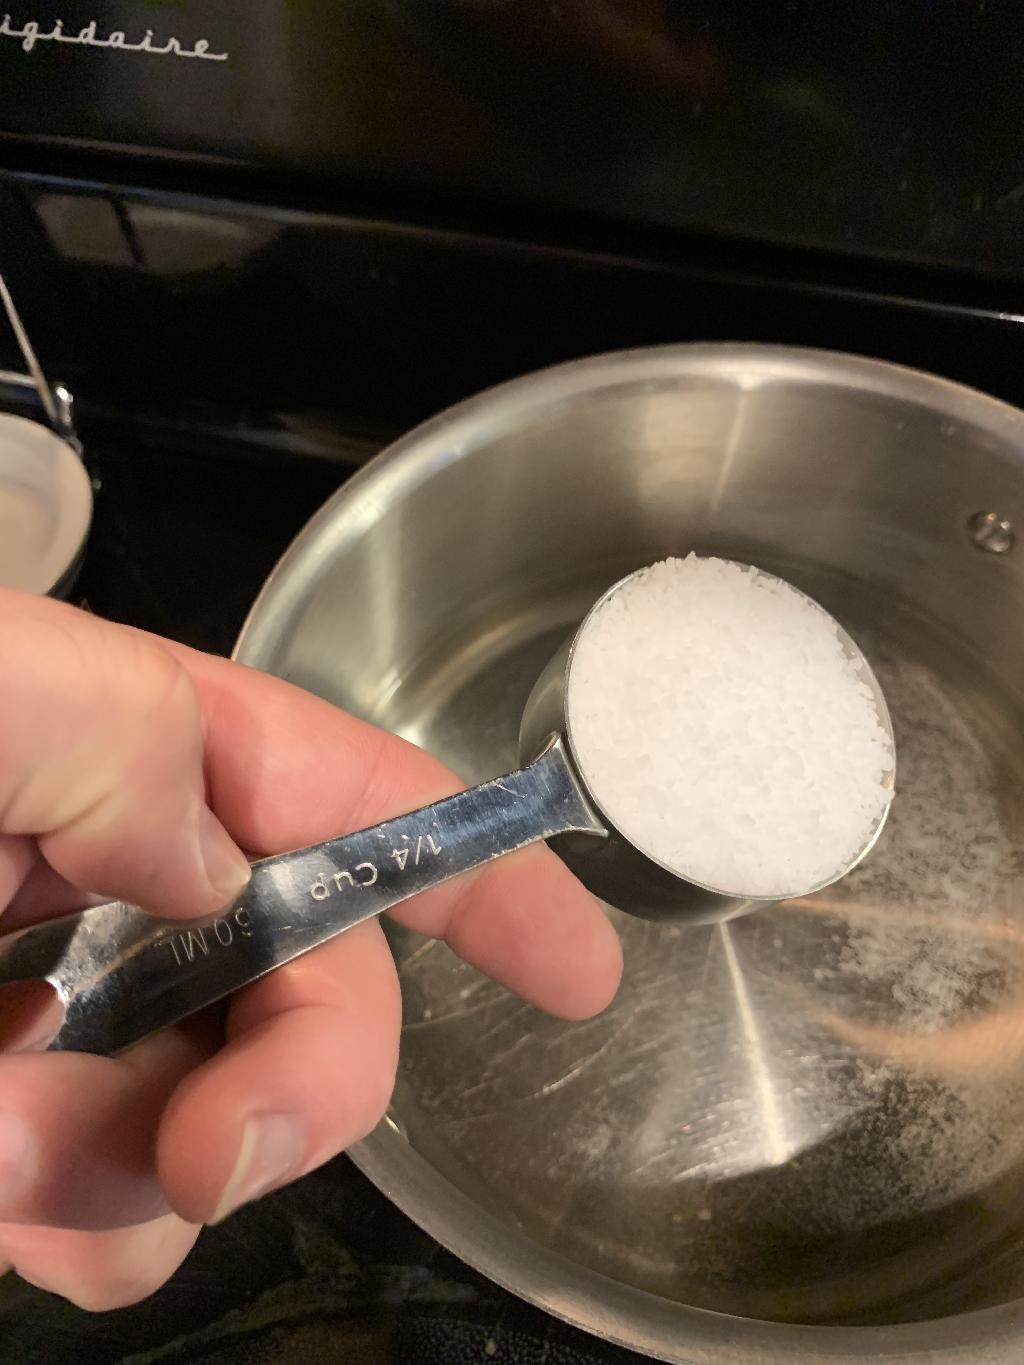
Step #2 Add Salt and Sugar
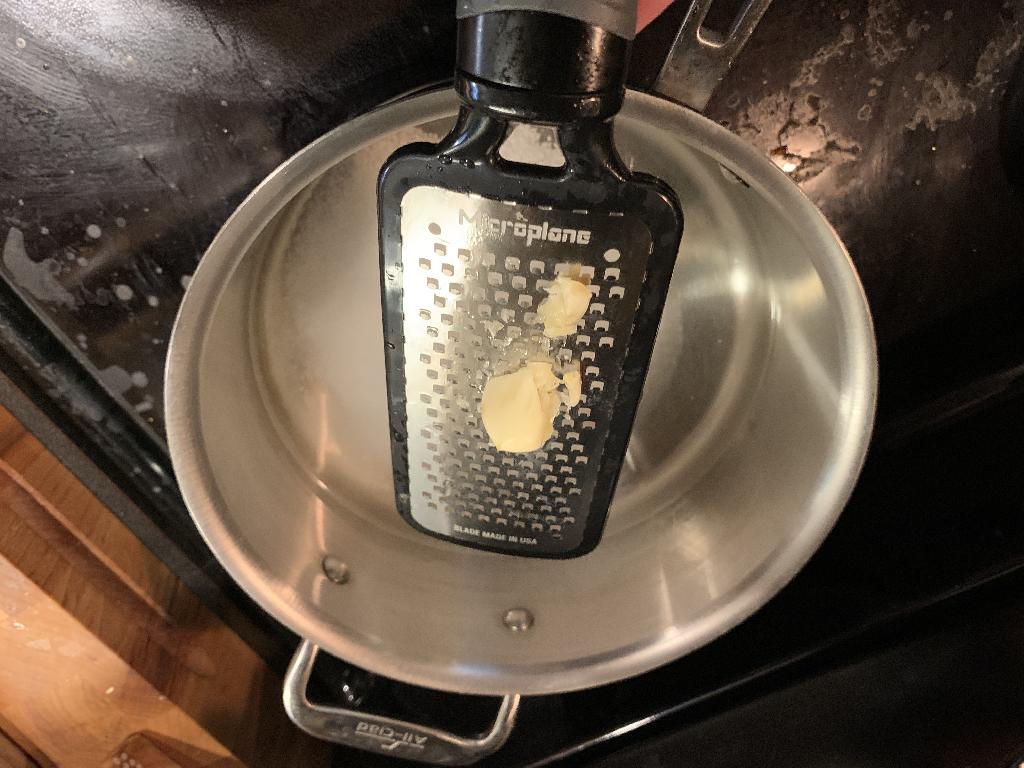
Step #3 Grate two garlic cloves into saucepan
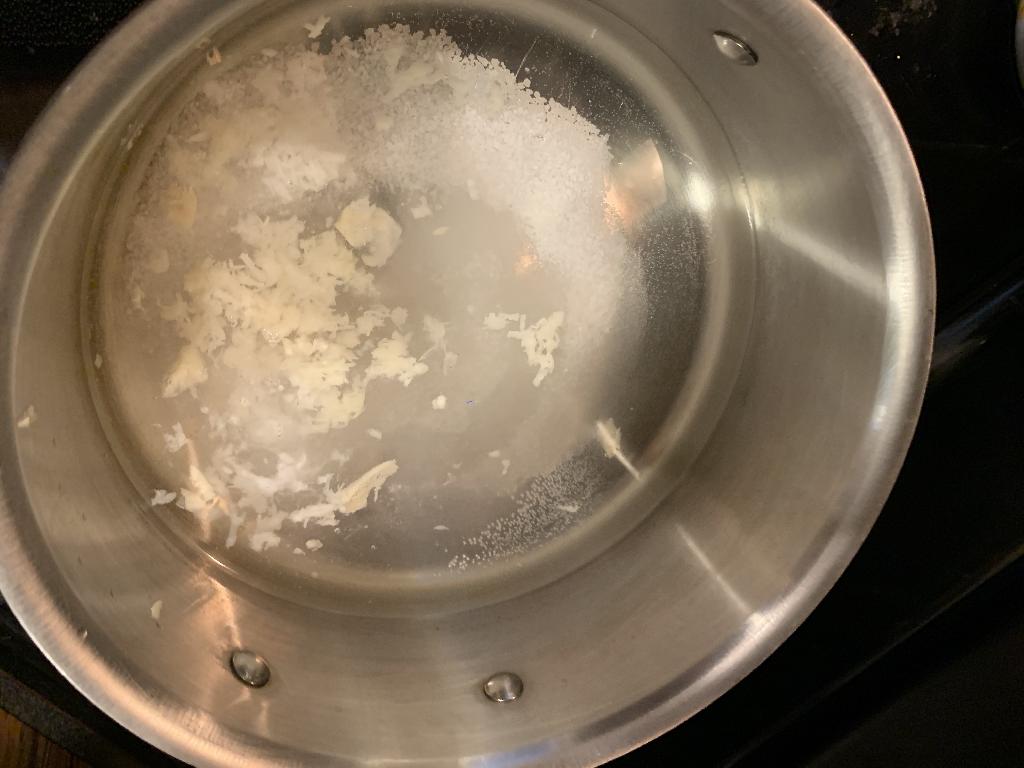
Step #4 Allow to reach a boil, let boil for 5 minutes

Step #5 Wash Jalapeno Peppers
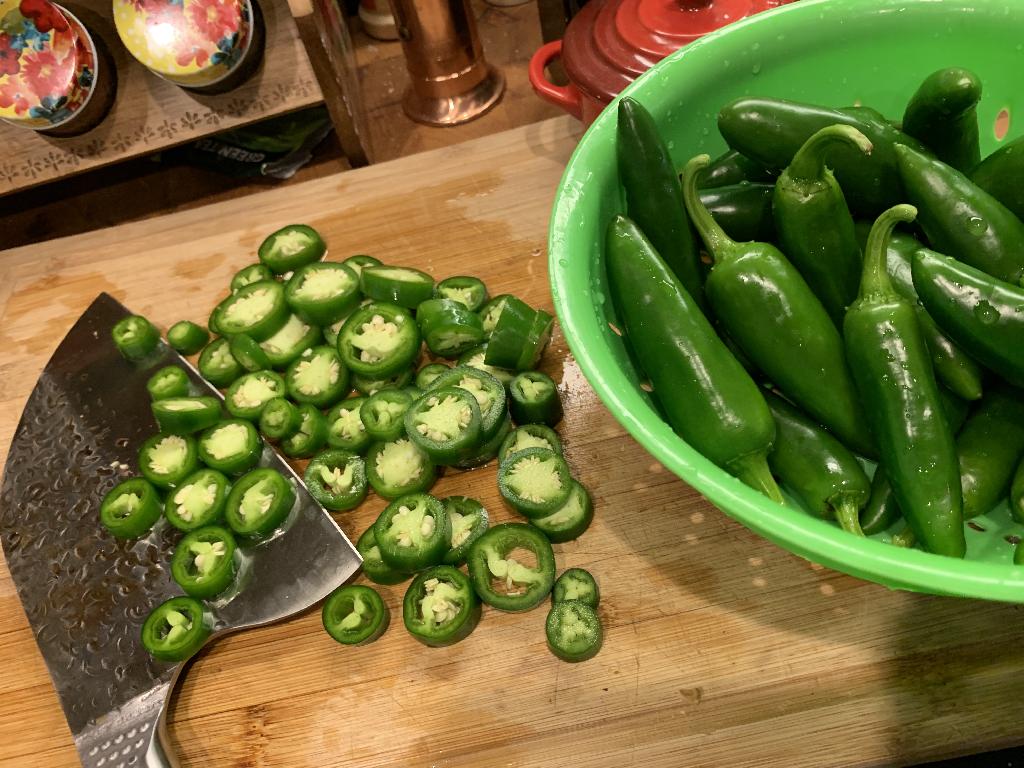
Step #6 Slice peppers

Step #7 Add sliced peppers to mason jar
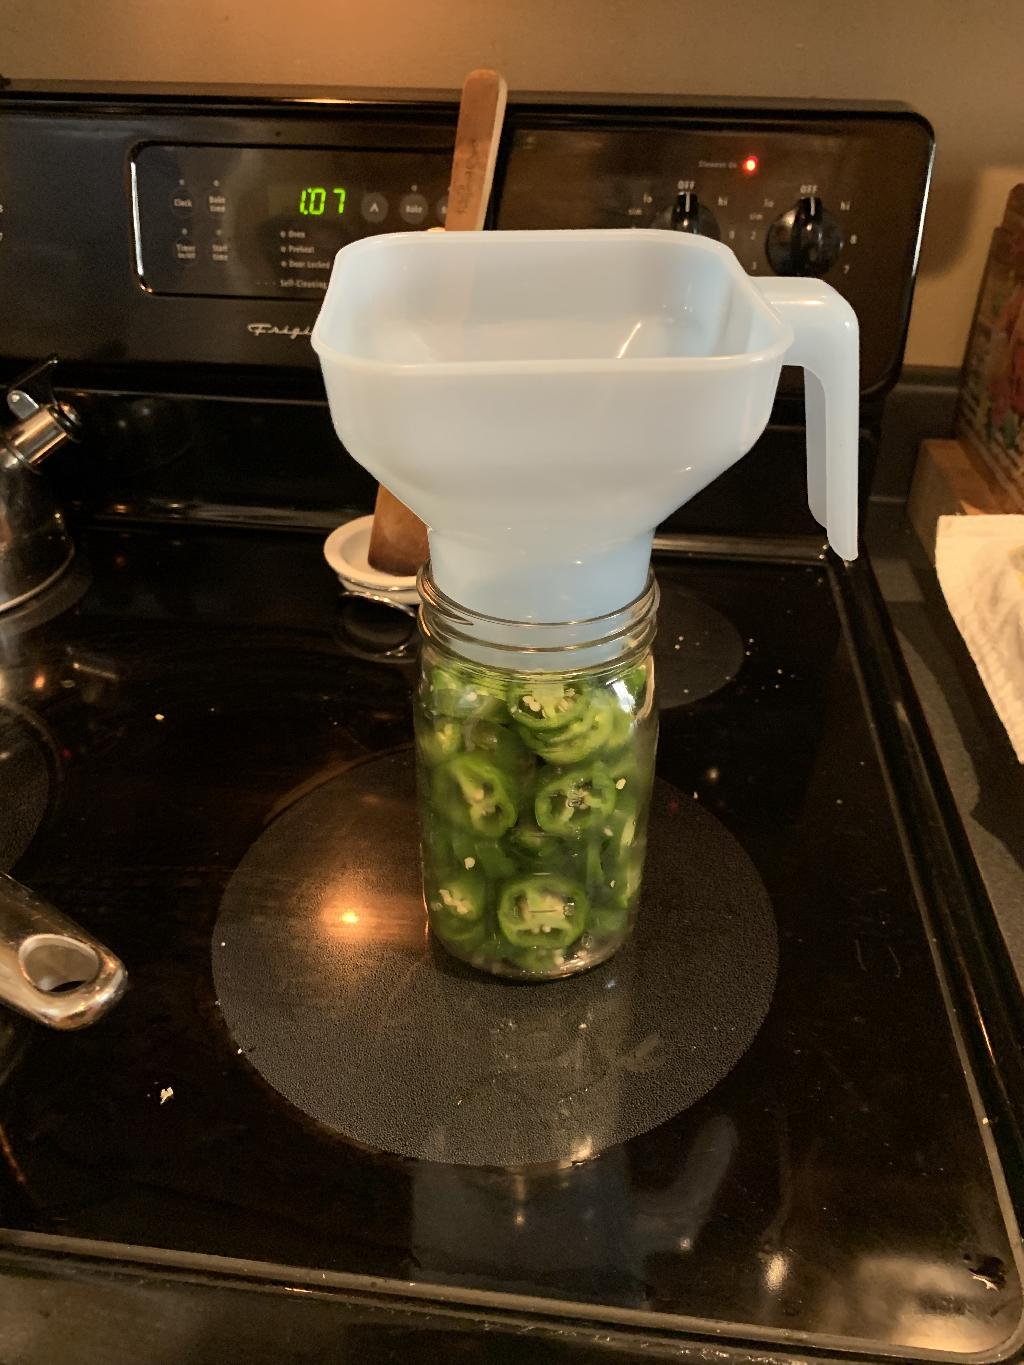
Step #8 Using a funnel, pour hot pickling liquid into mason jar
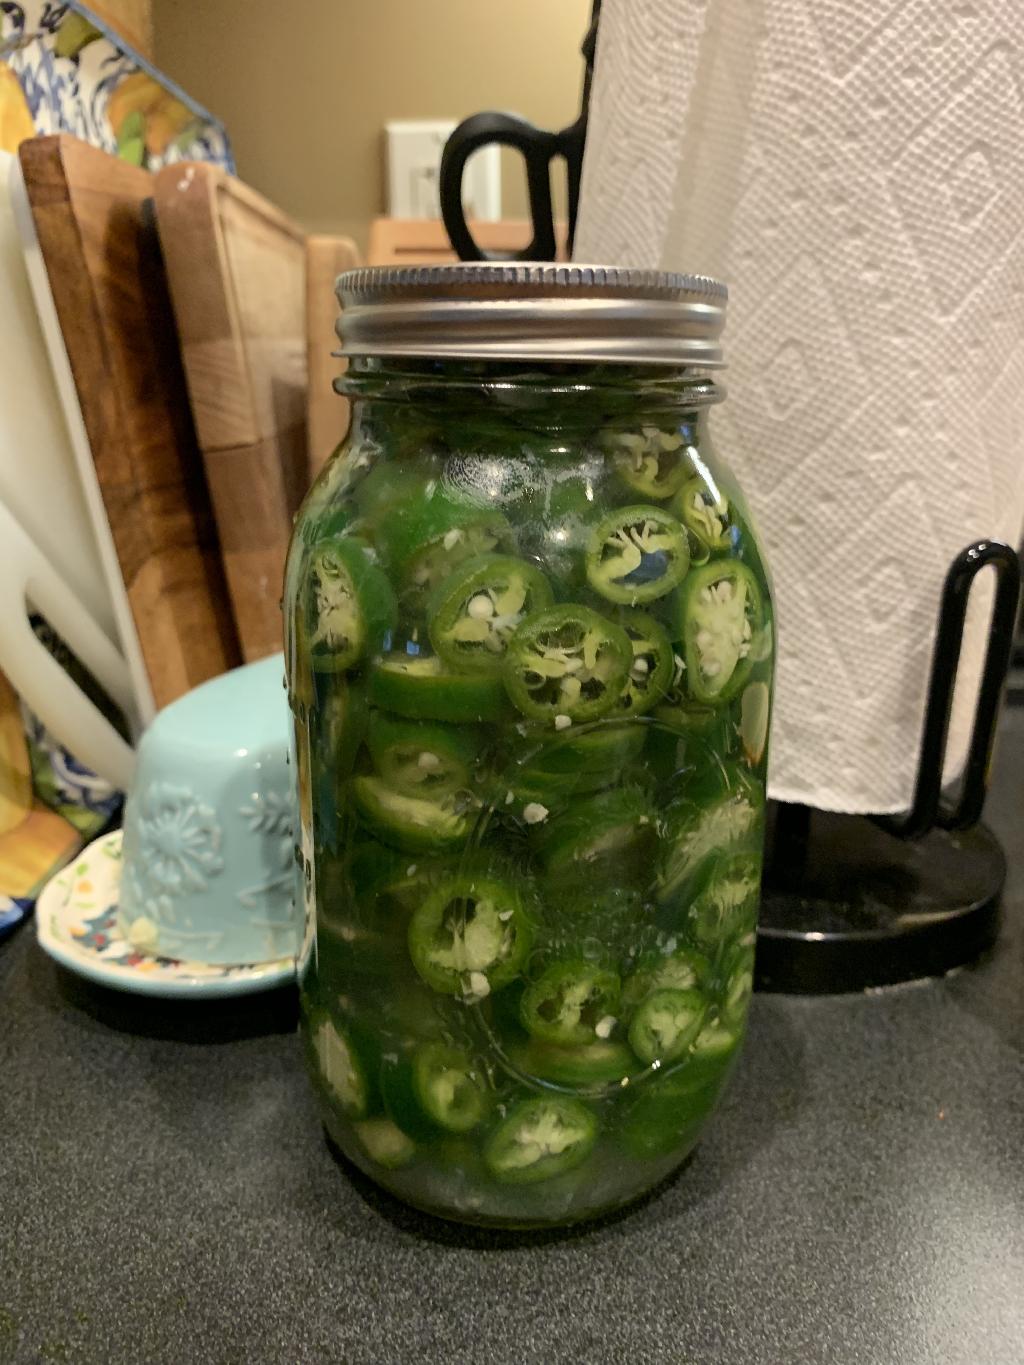
Step #9 Seal and allow to cool
Chilaquiles
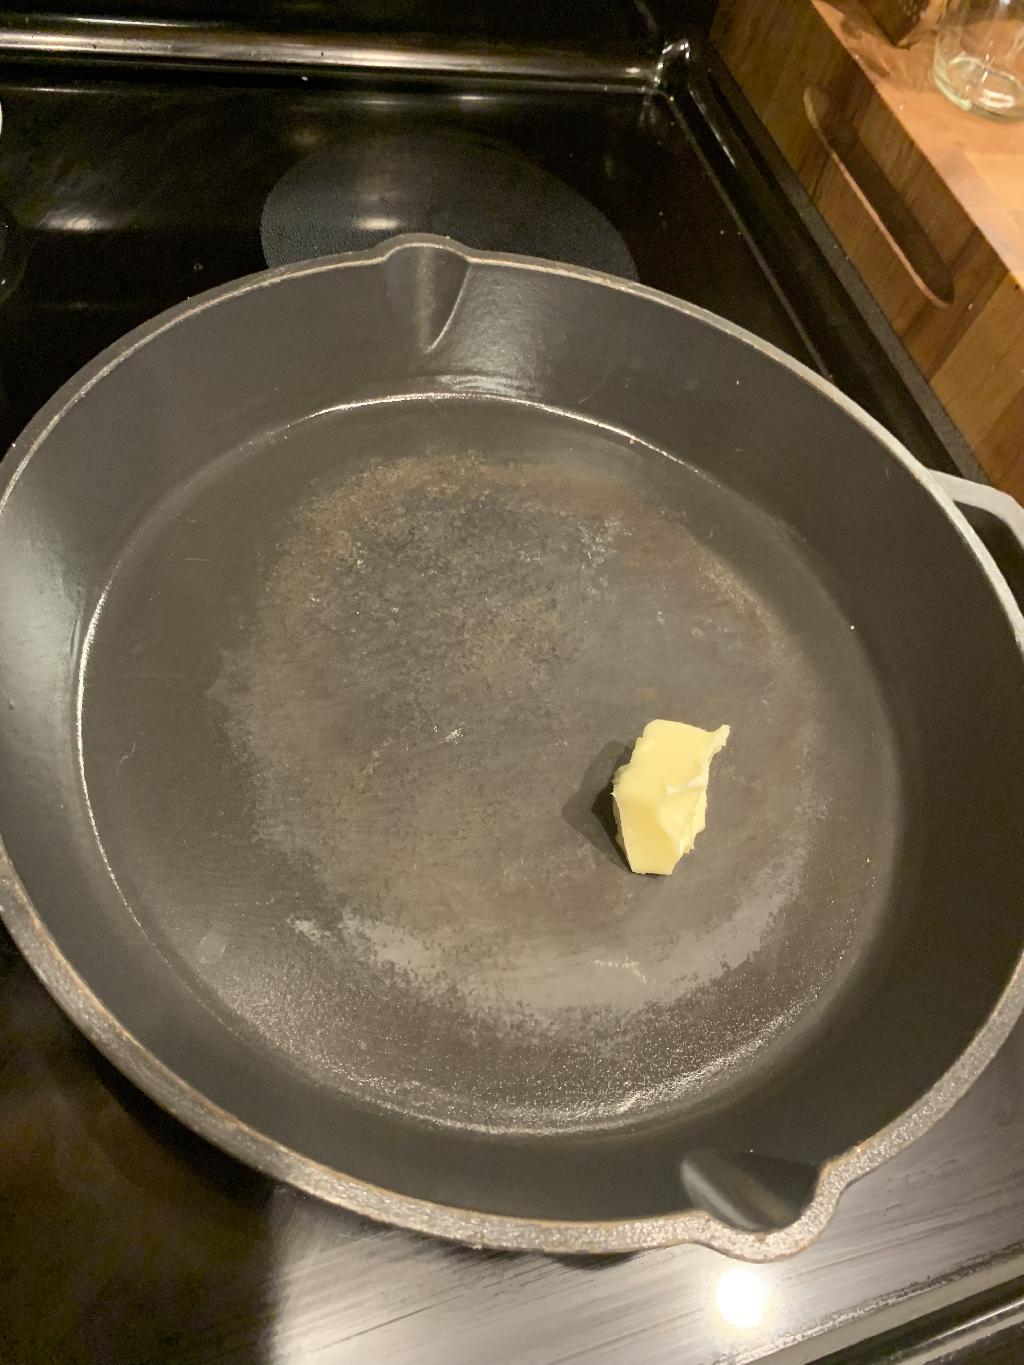
Step #1 Add one tablespoon of unsalted butter to skillet and set heat to medium high
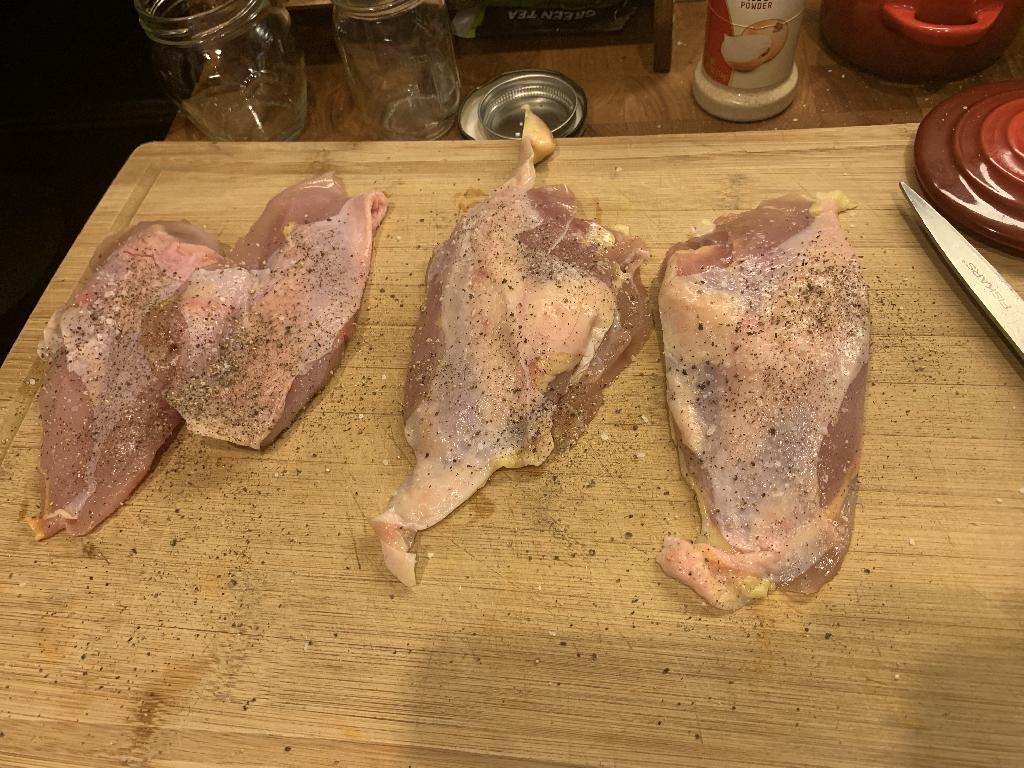
Step #2 Season the Pheasant Breast generously with Salt and Pepper.
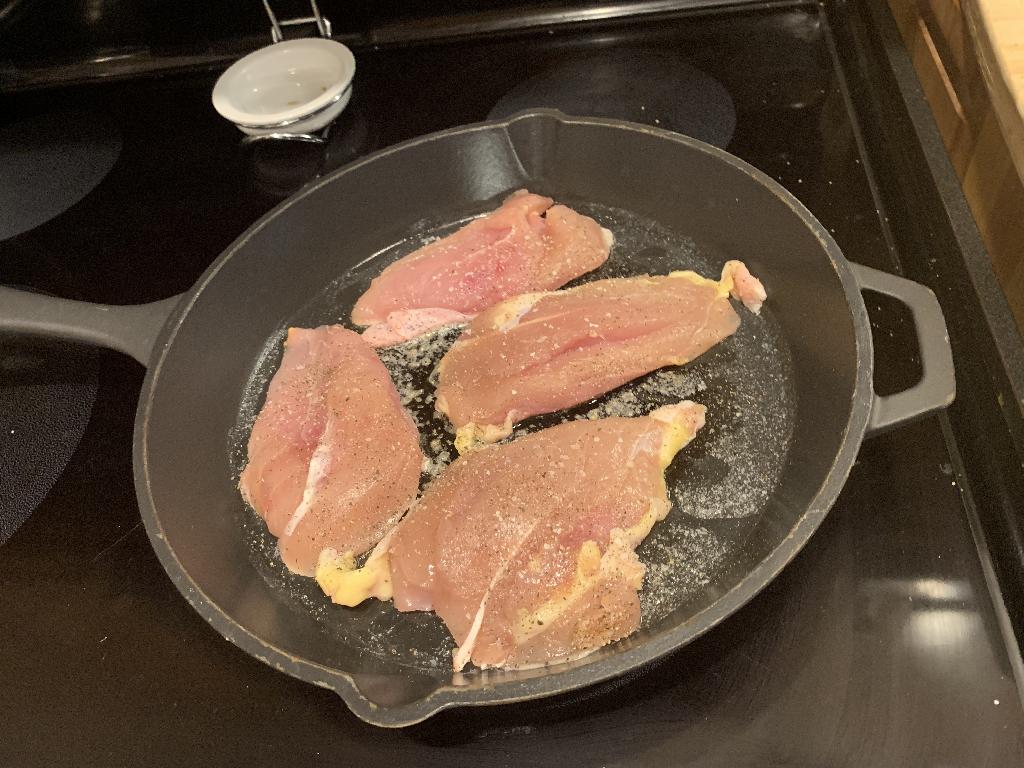
Step #3 Add Pheasant to hot skillet, skin side down. Allow to brown on one side before flipping over.
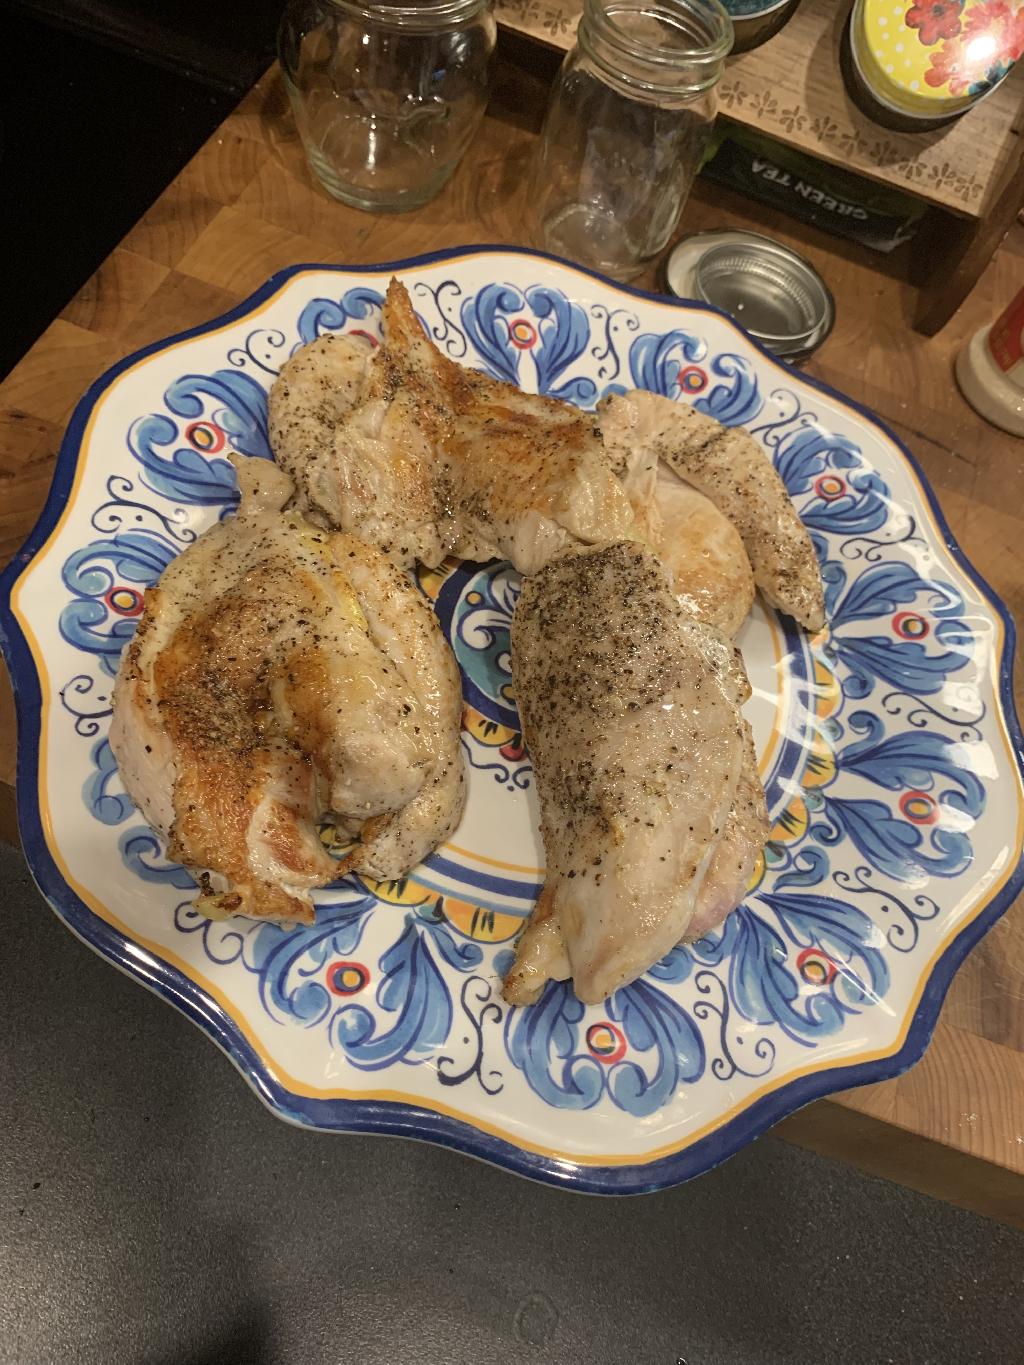
Step #4 When the Pheasant reaches an internal temperature of around 155 to 160, turn off heat, then remove the pheasant from hot skillet and allow to rest on a plate.
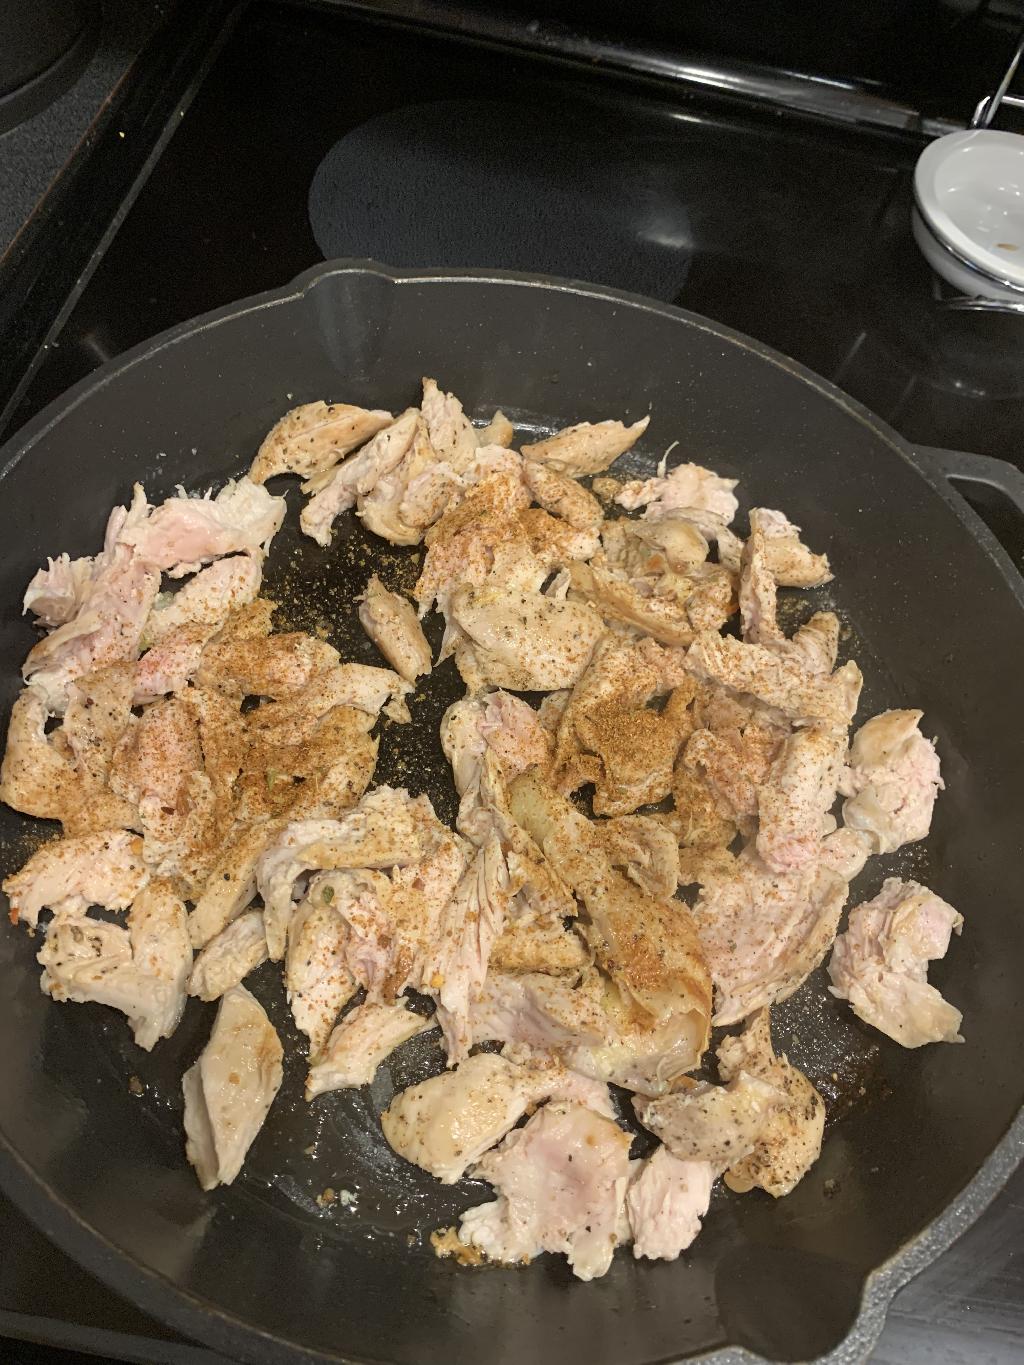
Step #5 When the Pheasant has cooled enough to handle, shred the meat and place back in skillet. Add a little more butter, season generously with Mexican Seasoning blend. Set the heat on medium low and allow to warm through.
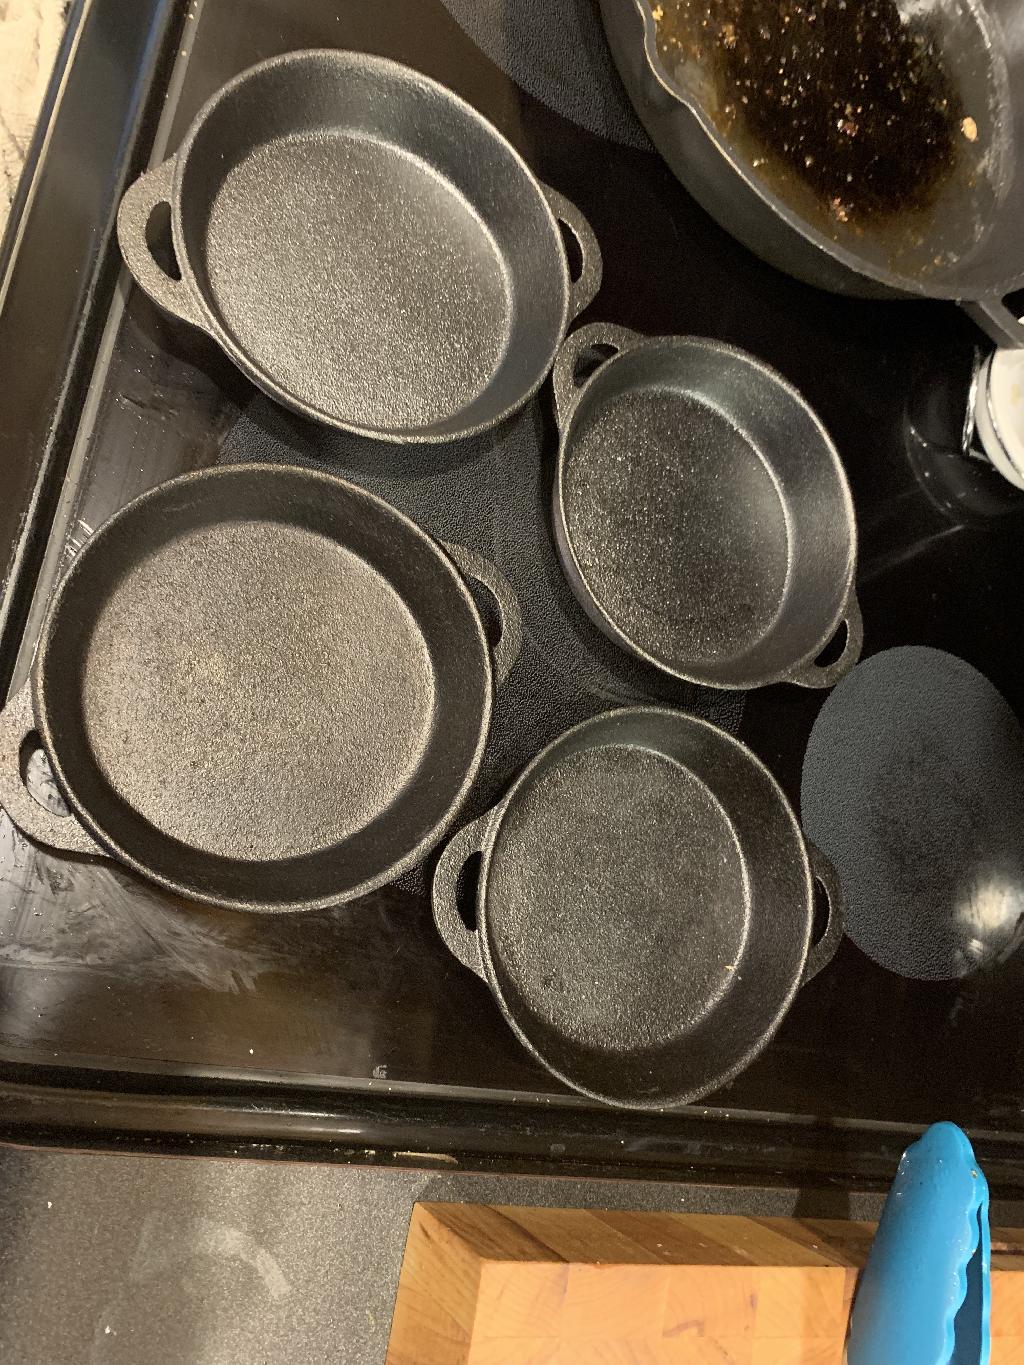
Step #6 Gather 4 oven safe plates, I'm using small cast iron skillets, and begin to build Chilaquiles
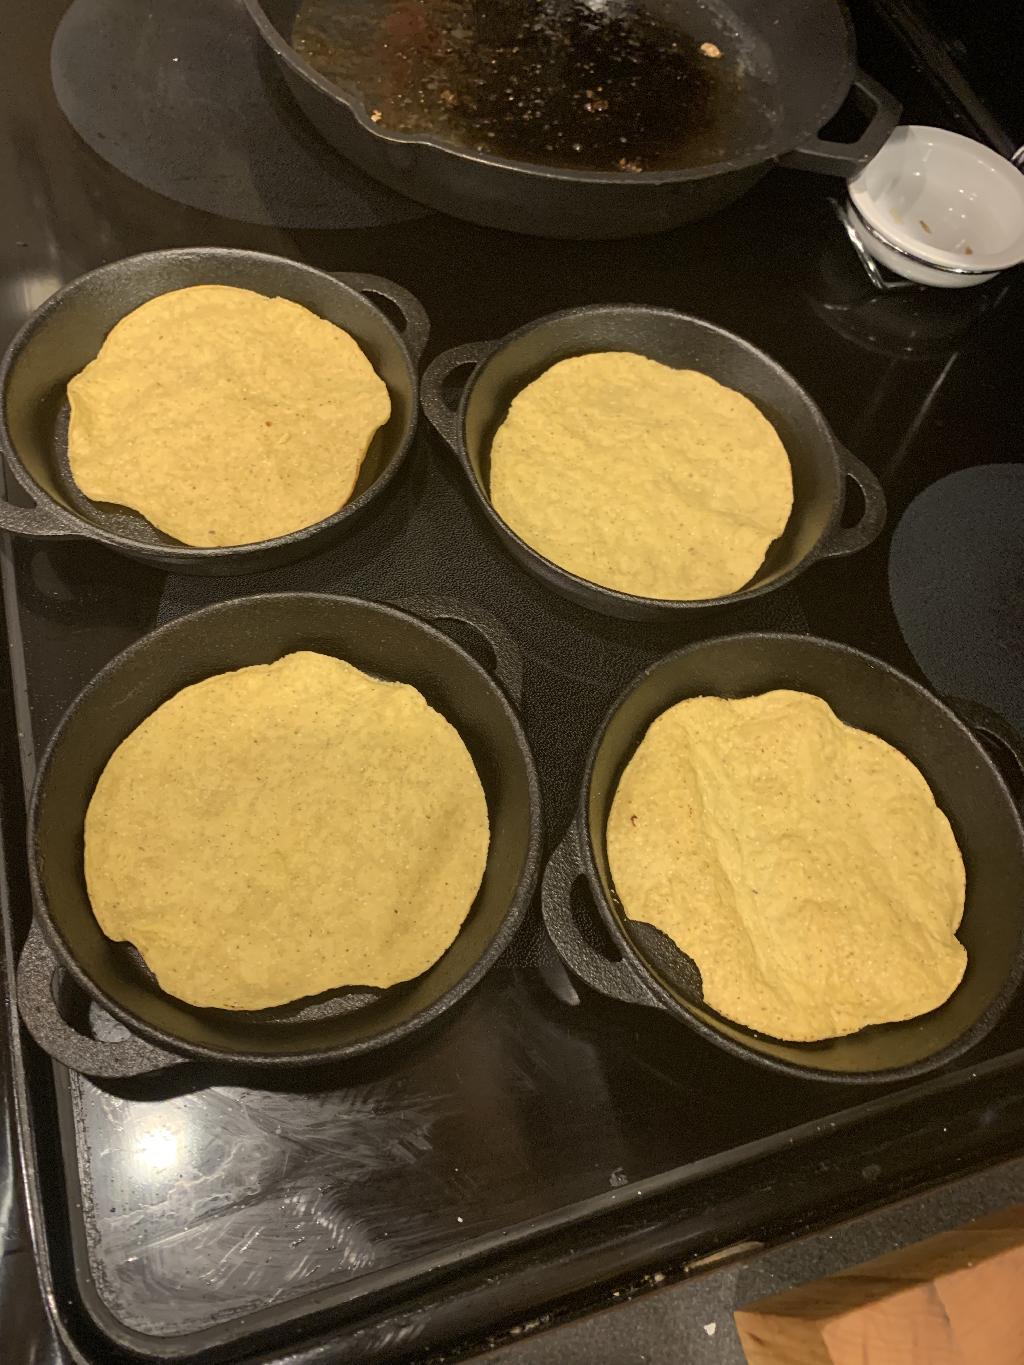
Step #7 Start by placing a Tostada in the bottom of each plate.

Step #8 Add some of the shredded Pheasant meat
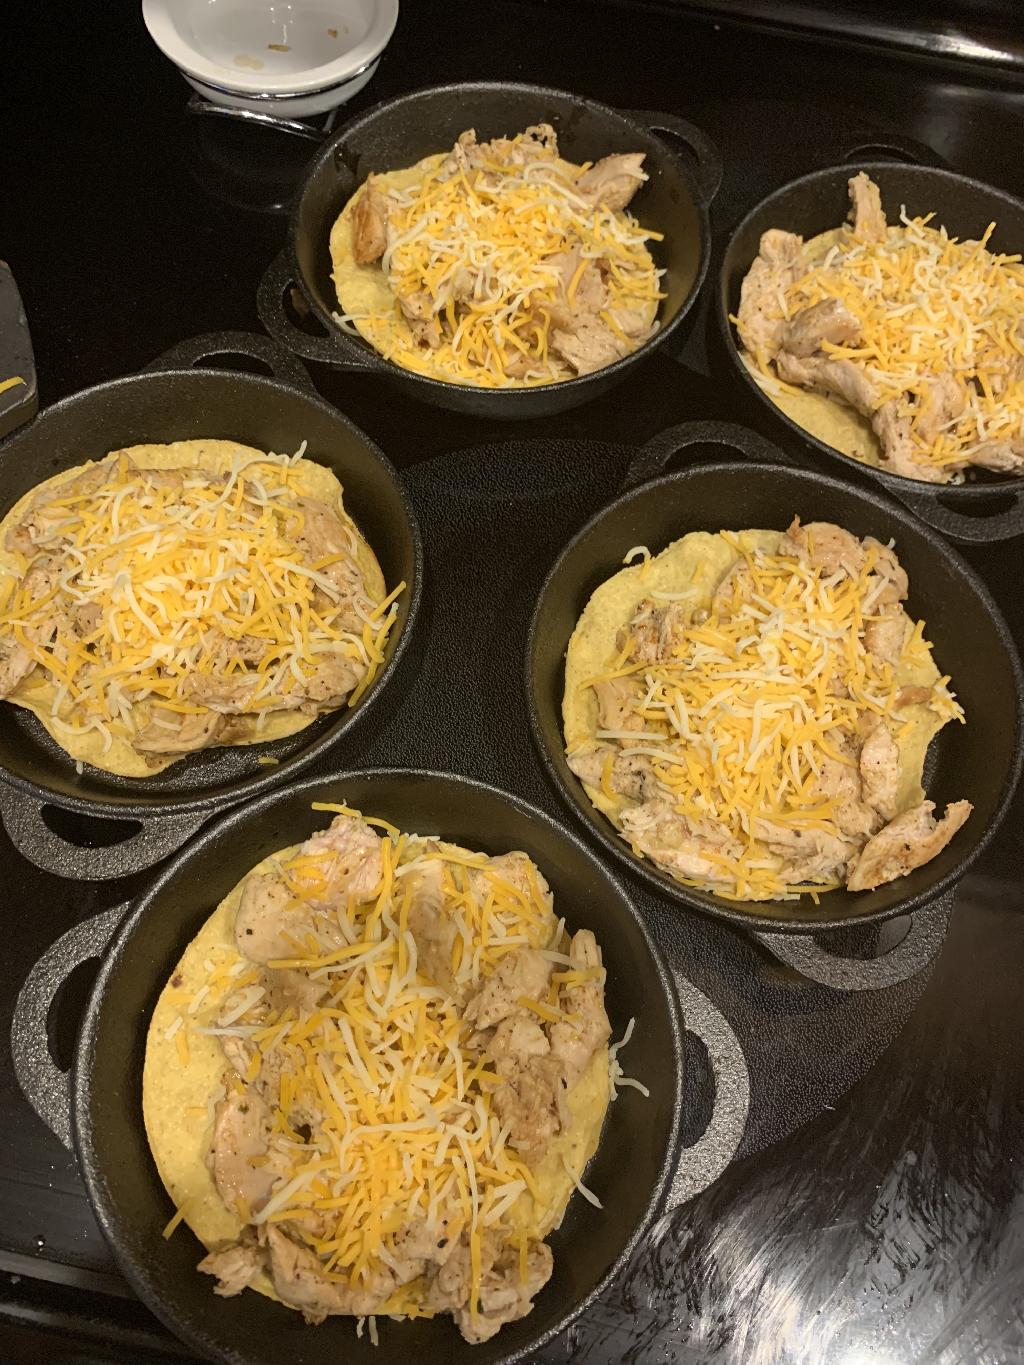
Step #9 Sprinkle with Shredded Cheese
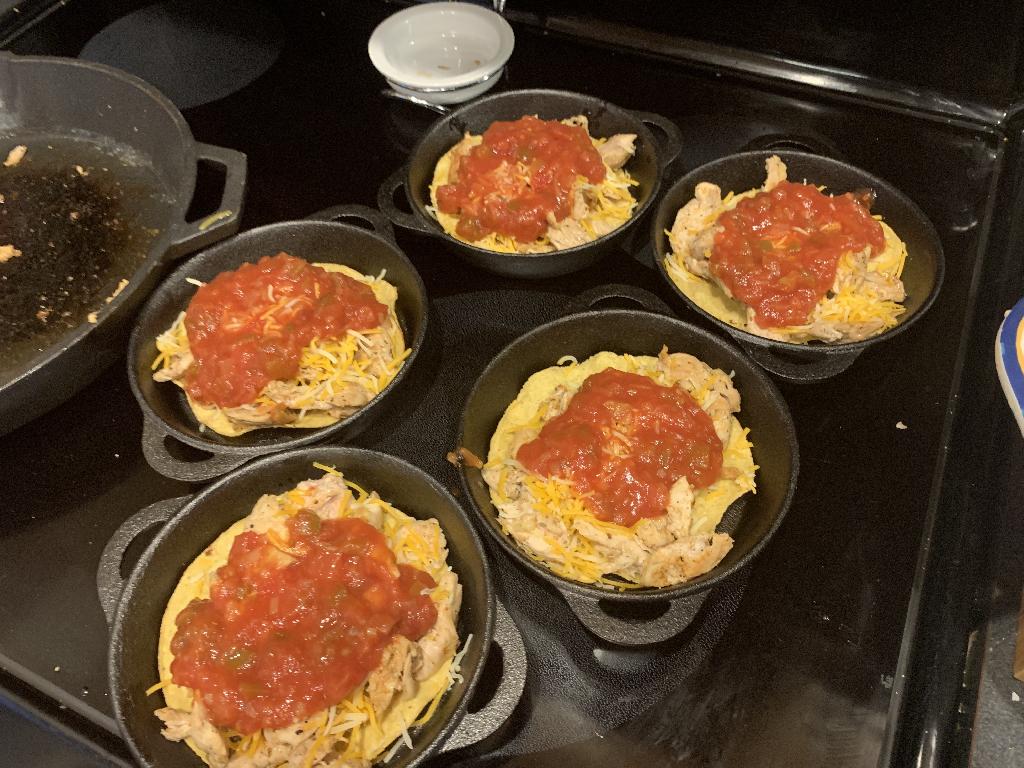
Step #10 Add a couple spoonfuls of the Roasted Tomato Salsa
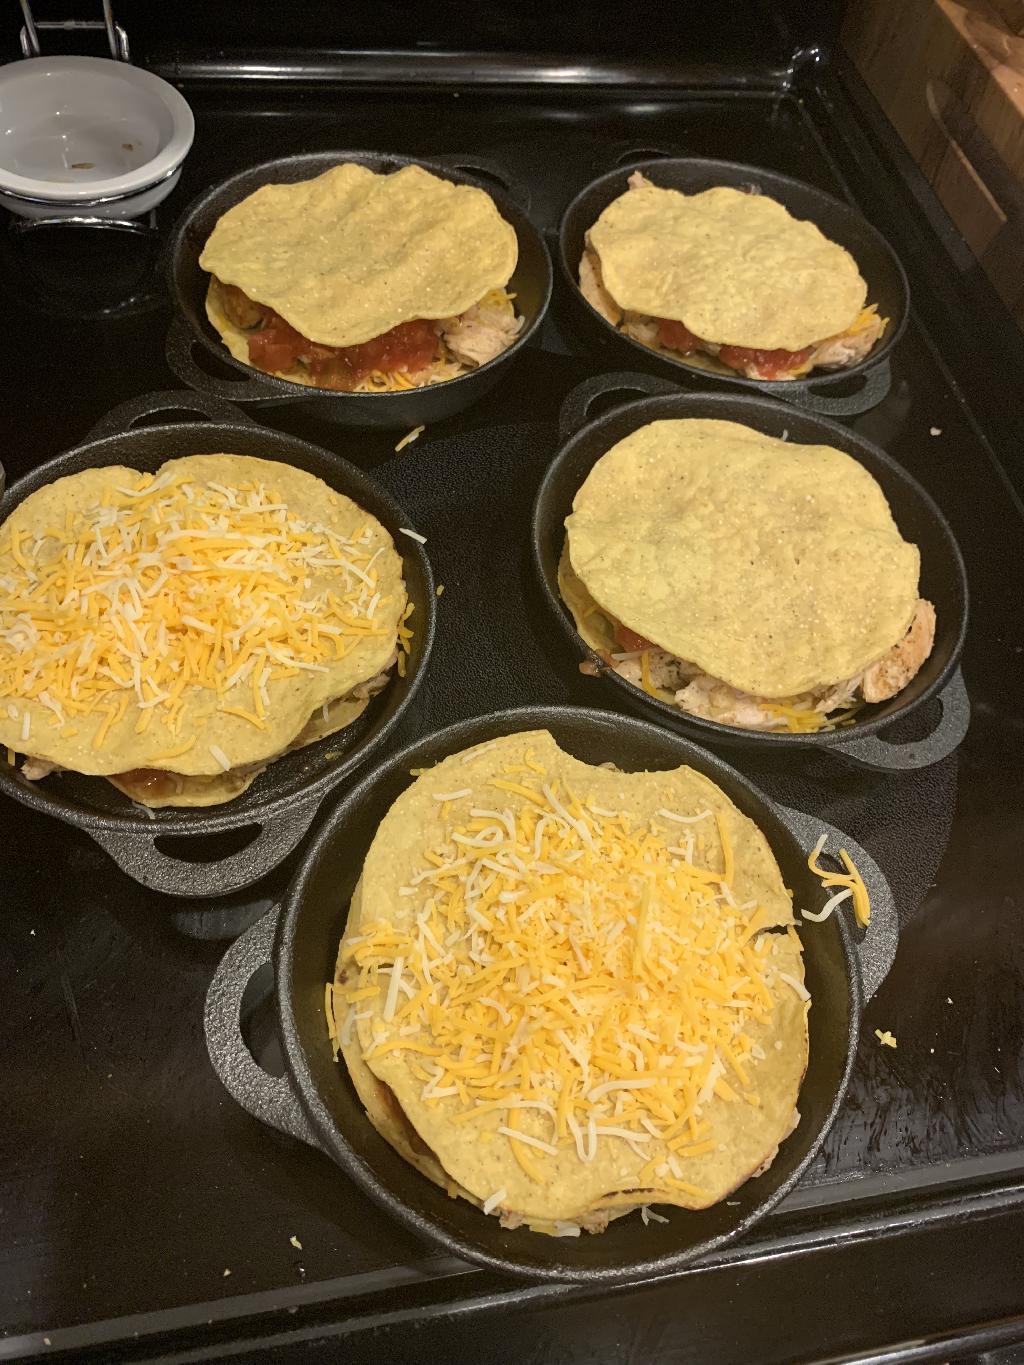
Step #11 Cover with another Tostada, being careful not to press down to hart, as the Tostadas are brittle and break easily.
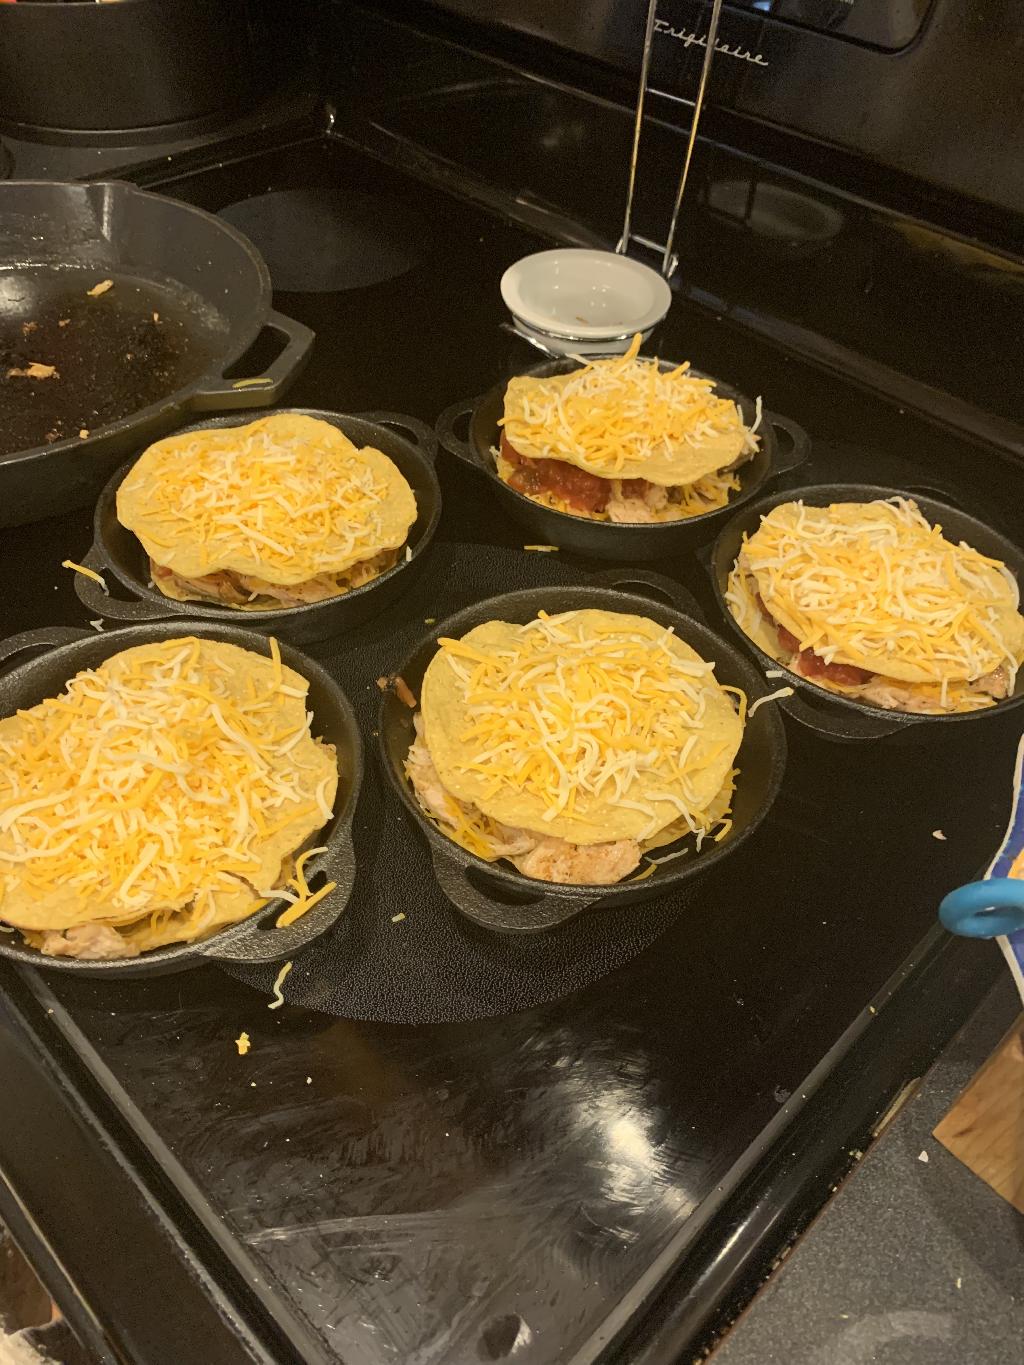
Step #12 Sprinkle this layer with more cheese.
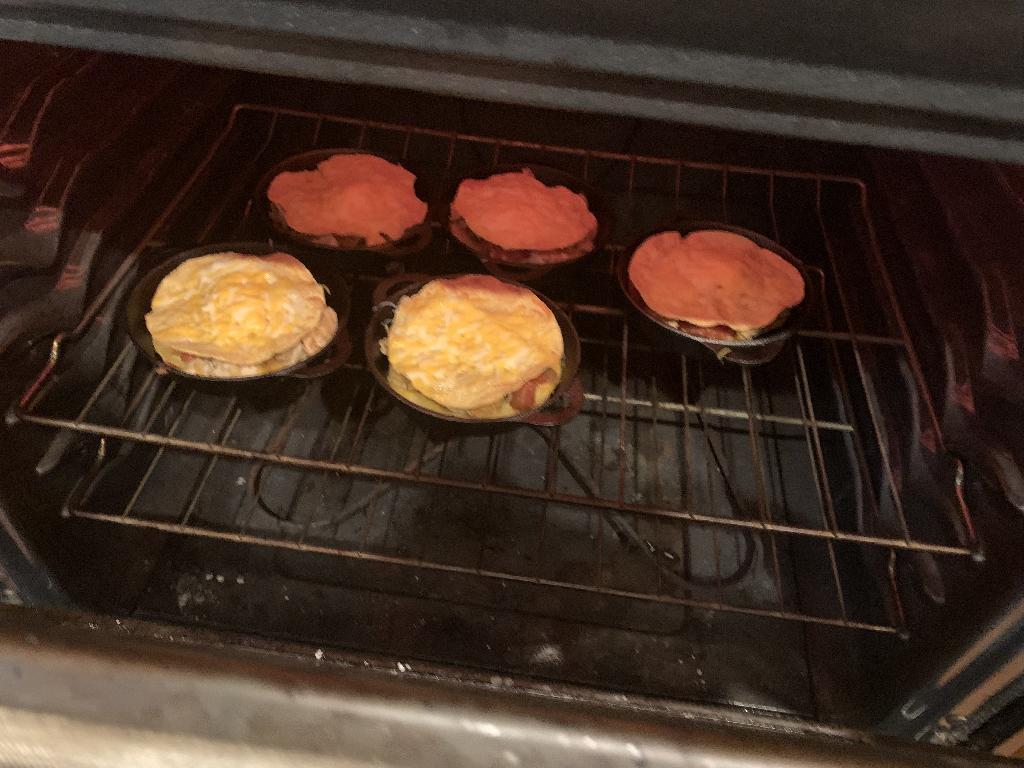
Step #13 Turn oven broiler to HI and placed plates in the oven

Step #14 Allow the cheese to melt and turn golden brown, being careful not to burn them.
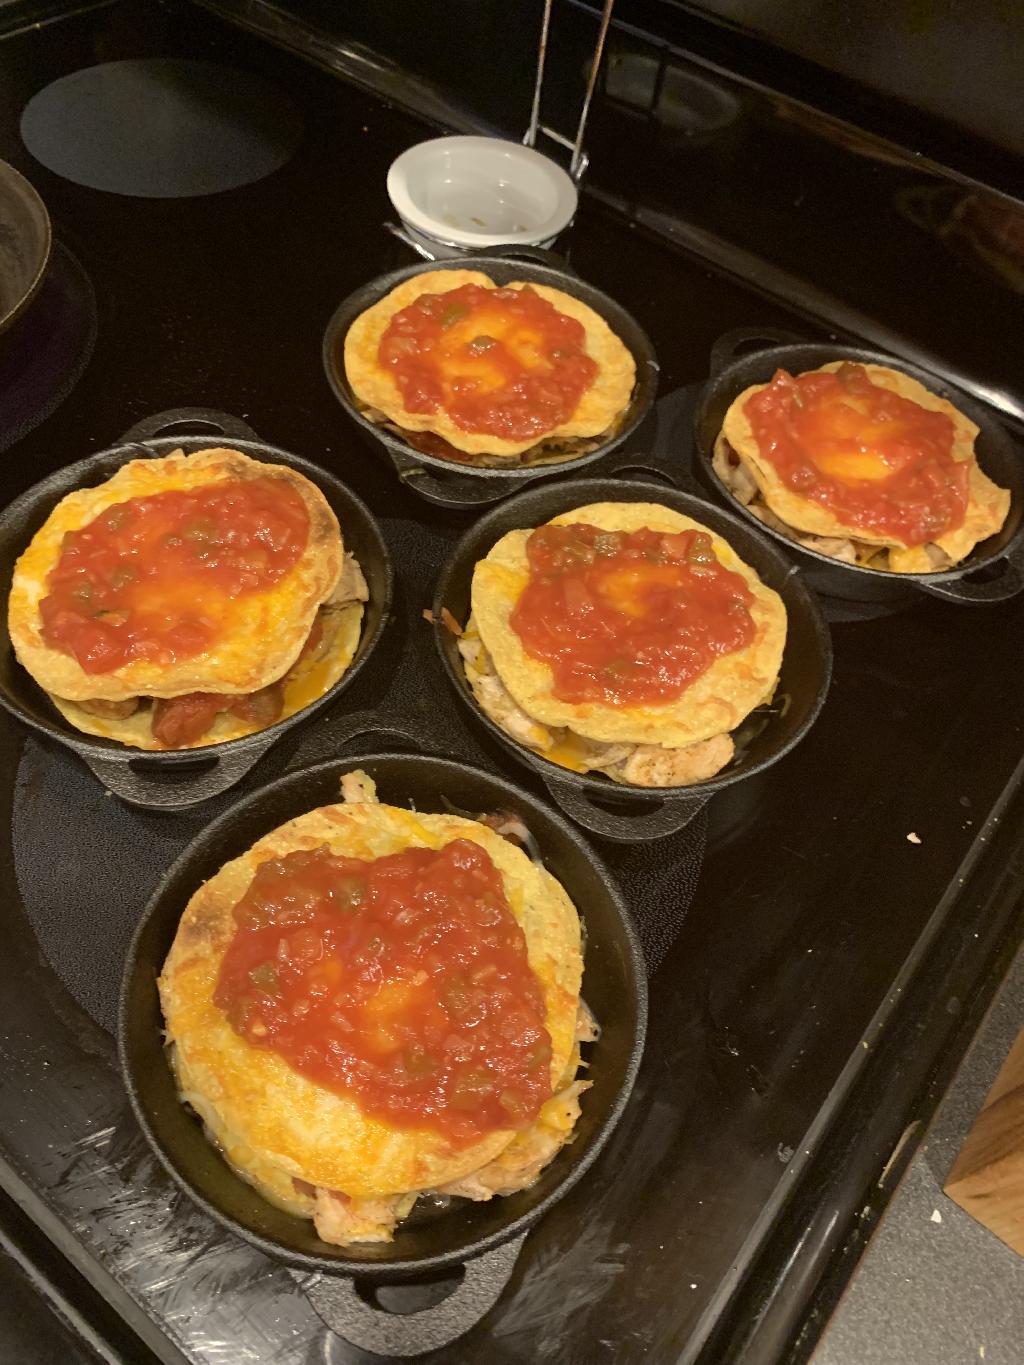
Step #15 Top this layer with a few more spoonful's of the Roasted Tomato Salsa

Step #16 Add one tablespoon of unsalted butter or cooking oil to skillet, then set heat to medium.
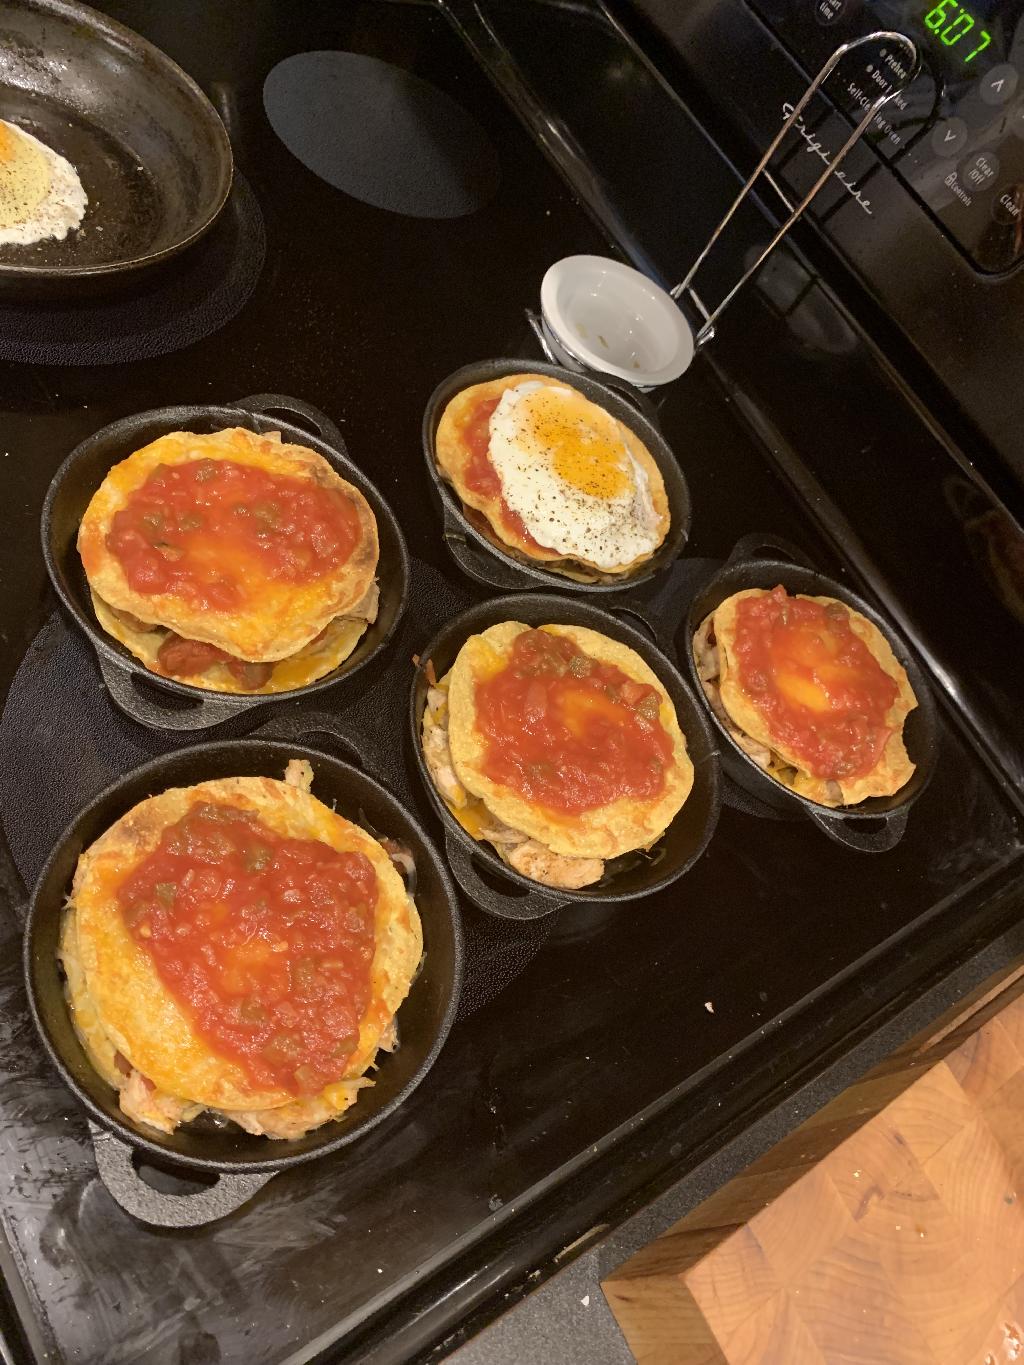
Step #17 Add one eggs, one at a time to the skillet and fry. When done, place fried egg on top of Salsa
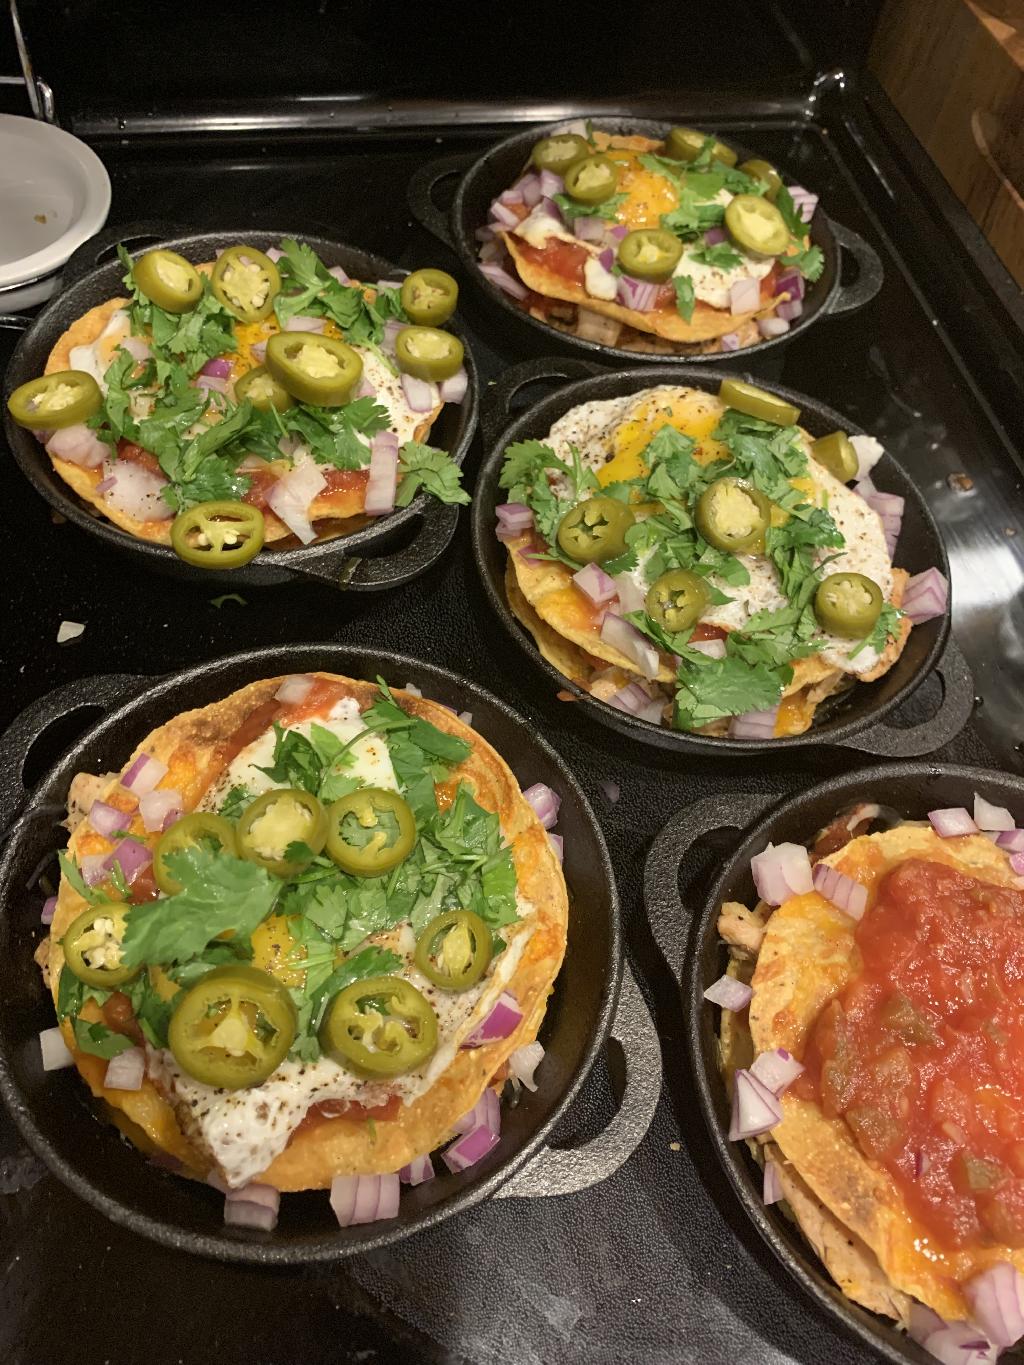
Step #18 Garnish with Pickled Jalapenos, Chopped Cilantro, Diced Red Onions, and your favorite Hot Sauce.
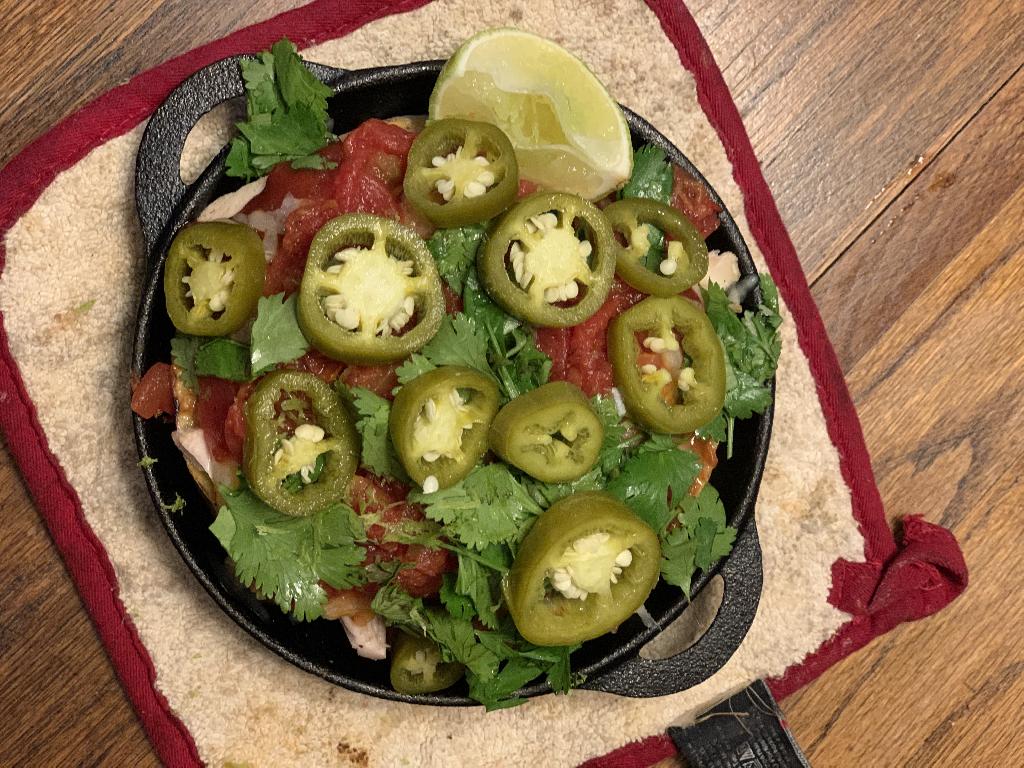
Step #19 Serve
Recipe Card
Pheasant Chilaquiles
Ingredients
Mexican Seasoning Blend
Roasted Tomato Salsa
Pickled Jalapenos
Chilaquiles
Instructions
Mexican Seasoning Blend
Roasted Tomato Salsa
Pickled Jalapenos
Chilaquiles
About the Author

Jeff Davis
Visit authors websiteYou may think cooking and recipes don’t have much to do with a website dedicated to hunting dogs ... but really, why do we hunt? Sure, we enjoy watching our dogs work in the field and being outdoors, but ultimately, hunting is about survival and feeding our families. We might as well try to do it well. I'm not a chef and definitely no food authority ... but I do like to eat and enjoy cooking. After searching for people willing to share their recipes on Gundog Central, without much success, I decided to try to do a few on my own, with my wife Tami's help. The recipes I share here are things I like to eat and have made here at home. I've tried to include step-by-step instructions with each meal describing exactly how I did it, but my method may not be best, if you decide to try a recipe posted here, please use whatever technique you think works best, I'm simply sharing how I did it. You'll see a lot of recipes where I've tried to make things from starch, when I could have just used store bought ingredients, simply because I wanted to learn how something was done. My goal is to continually update these recipes as I learn new things and techniques. These are my attempts at creating good, home cooked food, that I would like to eat! If I'm sharing it here, my family and I enjoyed it and I believe you will too.